Follow Us


Subscribe to our

Newsletter

Welcome to this overview of windshield crack repair training and also a close look at Ultra Bond's windshield crack repair kits. In this training guide, you can expect to learn what's actually in our kits and how all the tools work. It's also vital to know some of the back context to windshields and contains must know industry information to help prime your level of understanding when it comes to making a repair in the future. We'll cover information about which resin to use to handle long cracks and edge cracks. By the end of the training guide you should have enough knowledge about the kits and cracks to start successfully practicing repairs on windshield glass.

Welcome to this overview of windshield crack repair training and also a close look at Ultra Bond's windshield crack repair kits. In this training guide, you can expect to learn what's actually in our kits and how all the tools work. It's also vital to know some of the back context to windshields and contains must know industry information to help prime your level of understanding when it comes to making a repair in the future. We'll cover information about which resin to use to handle long cracks and edge cracks. By the end of the training guide you should have enough knowledge about the kits and cracks to start successfully practicing repairs on windshield glass.

Windshield Repair Training Menu

How to Use Windshield Repair Resins and Tools for Crack Repair

How to Use Windshield Repair Resins and Tools for Crack Repair

windshield-crack-repair-training-science

Welcome to the Ultra BOND professional windshield repair technicians long crack training manual! We appreciate that you choose us to assist you in achieving your goal to be a successful windshield repair technician. If you have any questions or concerns, call us, we will do all we can to help you.


We recommend you watch our videos before and after reading this manual and go to our On-Line Store and learn the name of each tool and resin in your kit.


As you get out into the field and become familiar with your windshield repair equipment, windshield repair resins and our repair techniques, you will see how easy it is to repair cracked windshields.


This windshield repair kit manual is designed to provide you with the instructions you need to learn the basics of the art and science of glass repair. But remember, this is a hands-on business and the only way to become an expert is to do repairs. Read the instruction manual carefully, and be reassured that if you have any questions, Ultra BOND is here to help.

1-800-398-2663

8:00 a.m. to 4:30 p.m. Mon-Thurs; 8:00 a.m. to 12:00 p.m. Friday

ITEMS YOU WILL NEED IN ADDITION TO YOUR WINDSHIELD REPAIR KIT

  1. Petroleum jelly - (Vaseline) for lubricating suction cups
  2. Glass cleaner - Sprayaway is the best ,it is a white foam.
  3. Cleaning rags
  4. Large towel or mat for protection of the vehicle's hood
  5. Isopropyl (70% -91%) alcohol and acetone - for cleaning your tools
  6. 3M Scotch Tape - this whitish looking tape is made of Mylar.
  7. Cardboard is the best for a sunscreen. Make your own different sizes. Attach two suctions cups to hold it in place on the windshield.
  8. Larger Tool box. If you are going to be mobile your will need a larger tool box. One that will fit Sprayaway glass cleaner and cleaning towels etc.

NOTICE

The only real way to learn about windshield repair is to ACTUALLY DO IT! You should be proficient and comfortable with our windshield crack repair methods after approximately 20 repairs.


You must practice INSIDE a garage. This will allow you time to develop your technique and skills before you work in the sun, which requires that you work quickly.


BEFORE you go out to repair for money, you must first practice. Your name and reputation depend on it. Here are a few ways you can get experience.

  1. Find a junkyard that will allow you to work on windshields in the yard (this way they are still in the vehicle). Create your own, fresh breaks using your bullseye taper and center punch. The existing cracks may be too old and too dirty. To make an edge crack drill one inch from the edge of the windshield, half way through the out layer and tap a bullseye with the needle at a 45 degree angle. You can also use your probe and tap it with the handle of a screw driver. If you are unable to work in the yard, take an old windshield to practice on. The stress on a windshield out of the vehicle is much different than in the vehicle, but you will be able to get the feel of the tools, preparing, drilling and sliding.
  2. Sacrifice your own windshield.
  3. Purchase two or three pieces of laminated glass around 12" X 12" or 24" x 24". Practice drilling and tapping bullseyes on the glass sheets also.
  4. Best Method - Purchase a windshield and two saw horses. Lay the windshield on the saw horses. Using a glass cutter scribe on the side edge about one inch and then split using your hands, thumbs on the underside/innerlite. This will cause an edge-crack. You will get about 12-14 cracks like this from one windshield and by then you will be ready for the real world. You can also make breaks and practice drilling in the center to practice stone-breaks.
  5. At some point you will have to start repairing real breaks on other people's windshield. Start with neighbors, relatives or friends. Once you start with customers you do not have to charge if the repair does not turn out well.


You have to practice and you have to do the repairs. Watching may give you some tips but you cannot be confident in your repairs until you've done them.


Remember that like everything else windshield repair takes practice while learning, but you will make mistakes. A break will spread or you may break a drill bit (sometimes they stay in the glass). The spread can be fixed and the drill bit can remain in the glass if you cannot pull it out (carefully with pliers and pull straight out), it's all in how cool you remain when it happens.

How To Make a Practice Station to Practice and Train Yourself

How To Make a Practice Station to Practice and Train Yourself

  • Purchase this saw horse from Harbor Freight for $11.99 (price may vary).


  • Order a 3' X 4 ' piece of flat laminated glass from an auto glass distributor or glass shop.


  • See our videos for how to make breaks and cracks.

SAFETY WARNINGS

  1. DO NOT LOOK AT THE ULTRA VIOLET LIGHT. It can burn the retina of your eyes. Wear 100% UV protective sun or safety glasses whenever you have it turned on and make sure the customer is not within it's range.
  2. AVOID GETTING WINDSHIELD REPAIR RESIN AND ADDITIVES ON YOUR SKIN. The resins contain an acid, which can cause rashes and blistering. Cleanliness is important. Do not allow the resin to drip down your injector. Wear protective polyethylene gloves and/or combine with a protective hand lotion. Wash your hands after each repair.
  3. DO NOT GET WINDSHIELD REPAIR RESIN OR ADDITIVES ON PAINTED SURFACES. The acid will eat the paint. Make sure you have the customer's vehicle well protected.
  4. THIS PROCESS IS NOT FOR COMMERCIAL AIRCRAFT GLASS.
  5. DO NOT PERFORM ANY REPAIR THAT MAY HINDER THE DRIVER'S LINE OF VISION.
  6. WEAR SAFETY GLASSES for protection against loose glass and resin.

WINDSHIELD REPAIR RESIN

Shelf Life: 3 years at room temperature.


Choosing the proper windshield repair resin for a particular job is a major part of the art and science of windshield repair. Making the right choice will make the windshield repair fast, easy and great looking. Choosing the wrong windshield repair resin can cause trouble while doing the windshield repair and deterioration down the road.


Windshield Repair Resin Safety: We recommend that you wear goggles and gloves when using the resins, additives, pre-treatments, primers and cleaners. Gloves, because some people react to the acid content with continued use, especially in combination with the drying effects of the alcohol used to clean your tools. Ultra Bond carries glove and cotton inner liners. Use your safety goggles provided in your windshield repair kit to protect you from small bits of glass, breaking drill bits, needles or resin.


Windshield Repair Resin Quality & Composition: The Ultra Bond resins are the finest in the business. They do contain an acid because it improves the chemical bonding process to the glass. Windshield Repair Resins without acid will have a considerably lower adhesive strength, as will resins with any contaminant such as pigment used to tint.


CHOOSING A WINDSHIELD REPAIR RESIN:

The underlying basis for choosing windshield repair resin is that you want to use the thickest resin possible, given the circumstances. The circumstances being: temperature and type of damage. Resin reacts to temperature like syrup, when it is warmed, it thins, when it cools, it thickens. Temperature will greatly affect the windshield repair resin you choose for a given damage.


Note: If you see bulls-eyes or combination breaks looking only partially filled after a few months, the resin has shrunk and pulled away from the laminate. The resin used for this repair was too thin or was not cured under pressure.


Low Viscosity Windshield Repair Resins:


Low viscosity (0-90cps) adhesives are for the repair of chips only , not long cracks.


High Viscosity Windshield Crack Repair Resins:


200 CPS: Use at the point of the crack including the drilled hole.


400 CPS: Use at the point of the crack including the drill hole.


1600 cps: Use in the edge area of an edge cracks. Can usually fill 1/3 - 1/2 of the crack. Start at the edge and slide toward the point  until it stops flowing.


2400 cps: Use in the edge area of an edge cracks. Must be used in the edge area of an edge crack when the impact is a stone-break (a star or combination break). The 2400 will be able to seal and separate the the break


100 CPS - This is not low viscosity but can be used with the Wonder Bar Bridge. All types of chips can be repaired with our 100 CPS Structural Adhesive windshield repair resin because this windshield repair tool can flex open stone-breaks like no other tool on the market.

How To Talk To The Customer

How To Talk To The Customer

About the repair


If you are talking to the customer on the phone, find out as much as possible about the break. How did it happen, what caused the break? How large in diameter is the break (use easy references such as nickel, dime, quarter)?


How old is the break?


Once you have determined it is repairable, tell the customer you can repair the crack, which will prevent it from spreading further, and it will remove the light refraction so that the damage will be barely visible. It will look a lot better, but it will NOT completely disappear. Remember you are providing a repair service, not a new windshield. Sell the benefits... prevention of further cracking, saving the OEM windshield which cost 3 times more than the aftermarket windshield their insurance company is going to put into the vehicle, cost savings and safety of preserving the OE Seal which is part of the crash pulse telling the air bag when to go off and can be altered when a windshield is replaced because glass shops most of the time will not look up the urethane used at the factory. This means the modulus will be different and alter the timing of the airbag which will render it useless.


Preparing The Vehicle

Preparing The Vehicle


  1. Have the customer move the car into the shade, a garage is best, or behind a building. (Do not get into the habit of moving the customer's car unless your liability insurance covers you for this). A tree is not true shade. If there is no shade, face the back of the car towards the sun and place a piece or cardboard on the roof of the car creating a baseball hat effect.. Use something a little heavy to hold it in place and have it wrapped with a towel and taped together so it wil not damage the vehicle if it is blown off by the wind.


   2. Place a thick towel on the hood of the car and place your tool kit on the towel. The towel should drape down and cover anywhere you might lean against           it. Watch out for your belt buckle. We recommend you not wear a belt because will will be leaning against the car.


  3. Carefully wash the area of the windshield around the break. DO NOT SPRAY CLEANER into the break, it will contaminate the repair.

PREPARING YOUR WINDSHIELD REPAIR TOOLS

Wonder Bar Parts and Assembly

In this section you will learn how to assemble the Crack Master Tools into several different tools and different configurations to repair cracks in the windshield. Below is the Wonder Bar Tool Kit which are the components used to create the Crack Master Bridge, Long Crack Slider, Star Flexor, and Chip Repair Tool. Here the cups are the most critical part of the kit that switch your tool and configuration.

Wonder Bar Tool Kit I

Wonder Bar Tool Kit II

How To Assemble The Crack Master Bridge


NOTE: Click on the arrow in the middle of the picture on the right side in the picture to advance to the next picture.

  • Slide title

    Underside of Crack Master Bridge Structure

    Button
  • Wonder Bar

    You will need two Wonder Bars

    Button
  • Slide title

    One Wonder Bar Connector Nut and Bolt

    Button
  • Slide title

    Two Soft Inch Suction Cups

    Button
  • Slide title

    Two One Inch Stabilizer Bolts

    Button
  • Slide title

    One Pressure Bolt

    Button

To assemble The Crack Master Bridge:


  1. (x2) Wonder Bars
  2. (x1)  Connector Nut and Bolt
  3. (x2) Soft Two-Inch Suction Cups
  4. (x2) Two One-Inch or 1 &1/4" Stabilizer Bolts
  5. (x1) Pressure Bolt

How To Assemble The Wonder Bar Crack Opener

  • Wonder Bar

    You will need one Wonder Bar

    Button
  • Slide title

    Two 2 Inch Soft Suction Cups

    Button
  • Slide title

    Wonder Bar 1 1/4 Inch Bolt

    Button
  • Slide title

    Two Wonder Bar Nuts On Each Side

    Button

To assemble The Wonder Bar Crack Opener:


  1. (x2) 2 soft two-inch suction cups
  2. (x1) one 1-1/4 " bolt and nut or 1-1/2 "
  3. (x2) nuts one on each side of the bar
  4. or- Recommended - use one nut, the nut MUST be placed upside down, with head on the bottom side, the same side as the suction cups. 

How To Assemble The Long Crack Slider

  • Wonder Bar

    You will need one Wonder Bar

    Button
  • Slide title

    One Pressure Bolt

    Button
  • Slide title

    One Soft Cup

    Button
  • Slide title

    One Wonder Bar Nut

    Button
  • Slide title

    One T-Nut

    Button

To assemble The Long Crack Slider:


  1. (x2) 3/4-inch stabilizing nut and bolts
  2. (x1) Pressure Bolt
  3. (x1) 2-inch soft suction cup
  4. (x1) Wonder Bar Nut
  5. (x1) T-Nut 


    * 6. OR  pictured above -  (x1) two-inch Suction Cup Nut with the (x1) hex-nut and washer on the threads of the suction cup.

How To Assemble Star Flexor

  • Slide title

    Star Flexor Side View

    Button
  • Wonder Bar

    You will need one Wonder Bar

    Button
  • Slide title

    One Pressure Bolt

    Button
  • Slide title

    One Stiff Cup

    Button
  • Slide title

    One Wonder Bar Nut

    Button
  • Slide title

    One T-Nut

    Button

To assemble The Crack Master Bridge:


  1. (x1) 2-inch stiff suction cup The two nuts go on both sides of the injector hole, then thread the bolt through both nuts.
  2. (x1) 1-1/2 inch bolt with two nuts.
  3. (x1) Attach a wonder bar nut 
  4. (x1) T-Nut on top of the Wonder Bar Nut
  5. Install T-Nut::  With the stem going into the nut hole OR the two-inch Suction Cup Bolt with the hex-nut on the threads of the suction cup.
  6. OR -Pictured above - 2" Suction Cup bolt with with washer and white hex nut on the cup threads.

How To Assemble Single Bar Chip Tool

  • Slide title

    Bottom of Windshield Chip Repair Tool, 3 Inch Stiff Cup

    Button
  • Slide title

    One Pressure Bolt

    Button
  • Slide title

    See washer and nut attached in the grove

    Button

To assemble The Single Bar Chip Tool the 3-inch flat cup is recommended.


  1. 3-Inch Flat Suction Cup on flat side of wonder bar -see picture
  2. nut and washer that came attached to the 3-inch cup placed in the grooved side of  the wonder bar
  3. (x2) 1-inch Stabilizing Bolts
  4. (x1) Pressure Bolt

How To Assemble Star Flexor Bridge

  • Wonder Bar

    You will need two  Wonder Bars

    Button
  • Slide title

    One Wonder Bar Nut

    Button
  • Slide title

    One Connector Bolt

    Button
  • Slide title

    Two 2 Inch Stiff Cups

    Button
  • Slide title

    One 1 1/2 Inch Bolt With Two Nuts

    Button

To assemble The Star Flexor Bridge:


  1. (x2) Wonder Bars
  2. (x1) Connector Nut
  3. (x1) Connector Bolt
  4. (x2) Stiff Two-inch Suction Cups
  5. (x1) 1-1/2 inch bolt with two nuts.


    * The two nuts go on both sides of the injector hole, then thread the bolt through both nut

How To Prepare Your Injector For a Windshield Crack Repair

Crack Master Bridge Structure

Quick-Turn Injector Piston

Quick-Turn Injector Chamber

  • Slide title

    Quick Turn Injector Piston

    Button
  • Slide title

    You Have Two Orings To Install On To The Piston

    Button
  • Slide title

    Orings Properly Installed

    Button

Installing O-Rings Onto The Injector Piston

Upon setting up your tool, your Crack Master Bridge, first you must build it.  Here we will walk you through step-by-step for making sure the Crack Master is ready for an immediate crack repair. It's critical that you practice setting up and building the tools, just looking at the videos is sometimes not enough, you need to associate what each part does with each other.


Step #1 The piston is the first step in setting up your windshield crack repair tool. You will need to assemble the red o-rings near the tip of the piston. There are two small o-rings that you will need to install into the grooves.

CAUTION - Do not stretch the red o-rings or they will tear. Very slowly and very carefully roll them into the piston seats. This helps create the necessary vacuum inside the chamber and the pressure when lowered. If you feel too much drag when the piston goes up and down you can cut the bottom o-ring off and just use one o-ring.

  • Slide title

    Lubricate The Orings One Drop

    Button

Lubricating The O-Rings

It is vital before you put the injector together that you lubricate your piston o-rings. This will make the turning of the injector easy. You can use any resin to lubricant with however 1600 and 2400 are best.


Step #2 Lubricate the two o-rings on the bottom of the piston with resin and carefully insert the piston into the cylinder until the o-rings are in the smooth part of the cylinder chamber. Then turn the set screw so it is into the grove section of the piston.

  • Slide title

    Install O-ring Onto The Injector Chamber

    Button
  • Slide title

    Lubricate The Oring To Seat Onto The Chamber

    Button
  • Slide title

    The O-ring Should Sit Flush

    Button

Installing Q-Ring Onto The Injector Chamber

To create the necessary seal against the glass for vacuum and pressure fyou need to install the third seal whihcis the white or black Q-ring onto the cyilnder base or bottom.. This Q-ring is critical in also creating a meniscus that prevents the windshield resin from leaking out and sucking in air when in the vacuum mode.


Step #3 Seat the third Q-ring onto the chamber bottom. In order to do that you will have to push and twist a dry Q-ring into the injector cylinder chamber seat. It must be dry and the Q-ring seat of the cylinder must also be dry. When you are done the Q-ring should sit flush. Then twist the injector into the holding structure, but do not go past the bottom of the wonder bar.

  • Slide title

    Fill Your Injector With Windshield Resin

    Button
  • Slide title

    Grease Your 2 Inch Suction Cups

    Button

Fill Resin & Grease 2 Inch Suction Cups

In preparation to start your long crack repair, you will need your tool to be agile and on a windshield you don't want any friction. Use Vaseline, a good amount rubbed into your 2 inch soft cups. You will need a good amount to slide the Crack Master Bridge down the path of a long crack.


Step #4 & 5 Lubricate the suction cups of the bridge with a liberal amount of Vaseline/petroleum jelly for smooth sliding. Also go ahead and take your bottle of resin and squeeze a few drops into the Quick Turn Injector. When doing this make sure you don't push the tip of the resin bottle into the chamber. Just sit the bottle onto the O-ring and squeeze slowly.

Next..... Setting Up The Long Crack Slider For The Windshield Crack Repair

Step #6  - Mount the Crack Master on the windshield and center the cylinder over the drilled hole.


Step #7 - Twist the cylinder until the cylinder is flush against the windshield and the bridge is level.  The two leveling and stabilizing bolts are set at the right amount of pressure for injecting resin without pushing the crack closed. The (center) pressure bolt is for temporarily increasing the pressure on the resin while injecting crack resin into the drilled hole at the point. Release the (center) pressure bolt off of the glass when you are ready to slide down the crack.  Raise the piston (counter clockwise or left) for vacuum and lower it (clockwise or right) for pressure.

Long Crack Windshield Repair Tools

Long Crack Sliding Structure

Crack Master Bridge Structure

Wonder Bar Crack Opener

Quick Turn Injector

Long Crack Windshield Repair

Crack repair has been a part of the windshield repair industry since 1990 when Ultra Bond founder Richard Campfield figured it out and was granted patents on what is referred to as 'The Multi-Viscosity Method". Windshield Crack Repair requires more skill, labor, chemicals and tools than the repair of a stone break but not near as much labor and skill as a replacement. You must be efficient at stone damage repair to understand this module. There is no difference in the skill to repair a short crack versus a long crack:


The objective when repairing a crack is to completely fill the crack and break.


The repair should be clear when looking at its profile (45 º angle) and there should be no lines or spots of refraction.


The major difference between repairing a crack versus a stone break where one tool is placed over the impact point and vacuum and pressure is applied, is with crack repair one tool is place at the point of the crack after it has been drilled and a bullseye tapped; another tool will be slid over the crack in order to inject the resin and another tool is placed on the inside to pry open and stabilize the crack.


The most important and critical component of crack repair is the resin and you must do your homework so that you know the resin's properties and use the right resins. You should know the fundamentals of adhesives because windshield repair is all about adhesives.


In a nutshell you repair a crack by:


(1) drilling and tapping a bullseye at the point of the crack;


(2) place a windshield repair tool over the drill hole, vacuum and then place in the pressure mode;


(3) place a crack opener on the inside of the crack approximately two- three inches from the point where your tool is set up injecting resin and turn the bolt to apply pressure and open the crack;


(4) prepare your crack tool and inject the crack by sliding it over the surface of the crack;


(5) Cure the resin and clean the windshield. That is it in a nutshell. Now for the specifics.


There are two types of cracks, a floater crack and an edge crack. 90% of crack repairs will be an edge crack. The edge crack is also the easier of the two.


Edge Crack Windshield Repair

The reason 90% of cracks are edge cracks is because of (a) residual stress and (b) induced stress at the edge of the windshield. As with any adhesive application you must understand the stresses you are dealing with in order to obtain a proper bond. Residual or manufacturing stress is created during the annealing process and causes this area of the windshield to fracture 2.5 times easier than the rest or interior of the windshield. Induced or installation stress is created from gluing the windshield to the vehicle. This stress causes the fracture to crack almost immediately. It is cracking to relieve this stress and it will go 8-12 inches.

Understanding Residual Stress

Residual stress is in the glass and is created during the annealing or cooling process after the glass has been bent and molded and comes out of the oven. The level or magnitude of residual stress can be controlled by controlling the cooling rate through the annealing range to prevent molecules from being pulled apart by the varying rates of cooling occurring at the edge area. This phenomenon causes there to be a perimeter band on the part which is subject to residual tensile stress and is hence the weakest area of the windshield.


It is technically called a "tension bulge". Very quick cooling results in high stress levels while slow cooling reduces the levels and hence increases the time and cost to manufacture the windshield. A band of tension exists just in from the edge. This tensile stress will taper to zero usually 1.5 inches from the edge. This area is called the "Weak Spot" by windshield manufacturer engineers - technically it is called a "tension bulge". It is required by contract with the vehicle manufacturer that an OE windshield not exceed tensile stress of 1000 psi and the edge compression be kept to 1500 psi minimum.


One of the differences between an OE and an ARG is an ARG windshield has no contract limiting these stresses and these stresses can be two times higher in an ARG windshield. OE's are annealed slower which increases the manufacture time and subsequently the cost of the windshield. You should notice when you repair a crack if it is an OE or ARG and also know that the resin you are using can handle this stress without yielding and retain its strength after exposure.

Understanding Induced Stress

Induced stress comes from the installation and is also referred to as installation stress. This is the stress that causes the fracture in the weak spot to crack and is also why nine out of ten cracks will be over six-inches. Because the windshield is being glued to the vehicle at its weakest area the residual stress is both increased in magnitude (200-1500 psi) and expands to about two inches in from the edge. You can feel the induced stress, which can be over 2,000 psi by knocking with your knuckle at the edge and go inward until you feel and hear it change.


Usually four to five inches in. This is the stress your resin must deal with. This stress causes the fracture to split apart (outward or perpendicular to the crack) creating a gap. The stress upon cracking is relived for the time being and then the opposing lamination stress pulls the crack back together usually after is has cracked 10-12 inches and the crack stops.


This is why an edge crack has a wide gap at the edge and at the point it has to be pried open to inject even low viscosity resin. So remember an edge crack has thousands of psi of stress and a gap at the edge and no stress and no gap at the point. The resin used at the edge area therefore needs to have the properties of a structural adhesive.


If the resin does not have the strength to hold the stress at the edge or it loses strength after exposure it will look like the diagrams in The United States Windshield Repair Guidelines.


Working with different temperatures affects the windshield repair resin and can call for alternative resin applications. This is why you need to know the fundamentals of adhesives and the properties of the resin you are using so you can adapt to the situation.


Repairing the Edge Crack

Drilling the Windshield the edge crack
Tapping a bullseye at the drilled hole

NEW Method - Injecting the Edge Area of an Edge Crack

with the Injector Seal on the Bottle Tip

edge crack resin injection seal tip
2400 edge crack resin injector tip
Windshield crack resin in the edge crack
Windshield crack resin injecting in edge crack
Injecting long crack resin with new bottle tip seal
Inject windshield crack resin 200 or 400 with the tool
Long Crack Slider Tool at the Point
Crack Opener Tool for Long Crack Repair

Method A: Meet in the Middle Method;#1 for Repairing Edge Cracks

Tools needed:


  1. (1) Long Crack Tool
  2. (2) Crack Openers
  3. (2) Quick Turn Injectors or Syringe With 1600 CPS or 2400 CPS for the edge area with the white syringe injector seal on the nipple of the syringe.

Best Method - This technique allows you to inject the thickest resin possible (the rule of thumb) in the majority of the crack. For this procedure you will need: one injector, one 1600 or 2400 with a white tip seal, one Long Crack Repair tool and 2-3 Crack Openers. The advantages of this method is you have one cure as you do not have to cure the bullseye at the point under pressure because it has 200 or 400 in it.


  1. Drill and tap a bullseye at the point.
  2. Mount either the Crackmaster  Long Crack Slider tool with your injector filled with the 200 or 400 resin at the point OR you can use the 2-bar bridge at the point (the tool with two suction cups) with 200 or 400 resin and straddle the crack. Use a liberal amount of petroleum jelly or Vaseline on the suction cup(s) as you will need to slide the tool - too much is better than too little.
  3. Mount a crack opener on the inside of the windshield about one  inch from the drilled hole and a second crack opener right next to the first one. If you only have one crack opener use a liberal amount of petroleum jelly or Vaseline on the suction cups as you will may need need to slide it. Too much is better than too little. You do not need to slide if you have two crack openers. Two cracks openers will work better than one and you can use Spray-a-way glass cleaner instead of petroleum jelly to lubricate the suction cups of the crack openers. 
  4. Use the vacuum and pressure process at the bullseye at the point. Now, flex open the crack with the crack openers until you see the 400 start to flow; then stop applying pressure with the crack opener.
  5. Go to the edge and inject edge crack resin (1600 or 2400) appropriate for type of crack and temperature. Starting at the edge where the installation stress has opened the crack up and created a gap. Use another injector or just the resin bottle with a white seal on the bottle tip with edge crack resin 1600 or 2400 and slide toward the middle of the crack unto it stops flowing. It will stop when the lamination stress becomes greater than the installation stress and pulls the crack inward/closed.
  6. Go back to the point and slowly slide down the crack keeping the resin flowing in front of the injector, do not get ahead of the resin. Slide until you meet the edge crack resin in the middle where the edge crack resin stopped. (If using the Crackmaster bridge structure at the point, straddle the crack and lubricate the suction cups very well.)
  7. Remove all tools. Tab the entire crack by laying a bead of 2400 resin on top of the entire length of the crack and then cover with film tabs or the whitish looking scotch tape to remove oxygen (air) from the resin and cure. With the Scotch tape you can just scrape it off and throw it away when you are done.


More Tool Options and Repair Methods with the Wonder Bar Tools.


For long cracks you can:


1. Use the 2- bar bridge at the point and drilled hole with 200 or 400 resin and straddle the crack. Using the pressure bolt will quickly inject the 400 into the drilled hole and tapped bullseye but be sure to release it when you go to slide down the crack. Always use two crack openers at the point.


2. Use one bar as a Long Crack Slider with a soft suction cup or the stiff suction cup. Use much more lubricant if you use the stiff cup as it does not slide as easily as the soft. Also make sure the cup is always flat to the glass when sliding, not riding the perimeter of the cup. The cup with the black hex bolt is the soft cup, the white hex bolt is the stiff.


3. Injecting the edge area with edge crack resin 1600 or 2400:


  (a) injector-slide by hand with the quick-turn injector,

  (b)  the resin bottle with the white seal on the tip

  (c)injector slide by hand with the yellow plastic injector.

  (d) Use the one bar Long Crack Slider but do not attach the suction cup to the glass. Thread the injector and stabilizing bolts so they are about one inch out of the bottom of the bar. See picture below. It will slide very easily without the suction cup attached to the glass. You can also use this in the middle of the crack with 200 or 400 resin once the edge crack resin has stopped flowing switch to the 200 or 400 and slide toward the point until it stops flowing. Then slide off the drill hole to fill what is left. This will usually only be 1-3 inches down from the drill hole. You can also reverse this starting at the point area once the crack has opened up enough to where you no longer need the pressure from the cup to inject resin and go towards the edge. Using 3 crack-openers helps going in this direction. This also comes in handy with very long cracks or cracks with multiple curves.


4. Floater Cracks - use four crack openers- two on each side of the stone-break and two long crack sliders, one at each point.

Method B: Edge Crack Repair with One Windshield Repair Structure and One Crack Opener.

This is called the "Two-Step" Method.


  1. Place a crack opener two inches from the point with light pressure on the bolt touching the glass. Use Vaseline on the suction cups so you can slide the crack opener if necessary.


    2. Mount your tool with 200 resin around the middle of the crack with your suction cups lubricated for sliding.


    3. Fill your other injector with edge crack resin or use the edge crack resin pressure syringe and starting at the edge injector slide into the middle until the

        resin stops flowing.


    4. Pick up with the 200 cps windshield repair resin where the edge crack resin stopped injecting and slide to the point. Stop approximately one inch from the

        point or when the resin stops flowing. Stop clean meaning the resin at where you stop is straight vertically and not bleeding toward the point.


    5. Release the crack opener pressure. Always remove the crack opener bolt from the glass before curing or you will alter the refractive index of the

         windshield repair resin.


     6. Tab and cure the injected section of the crack which will be approximately 95-98% of the crack.


     7. After curing go back and repair the point; drill and tap a bullseye and repair with 45 resin just like you would a normal stone break using vacuum and

         pressure. Cure under pressure, remove tool and pit fill drilled hole. Note: If the resin in the crack is not vertical and bled toward the point then use 20 cps.


     8. Clean up and you are done.


Note: This method is used on hot windshields because often when drilling the point when you go to tap the crack it will jump through the bullseye. By repairing all but the point and curing it you have relieved this stress and pulled the crack together.


The impact point of an edge crack will almost always be in the weak spot and is the variable that will determine your repair procedure and time. There are basically two situations with this variable and it is the type of impact you have. It will be a: (a) pin head size chip or (b) star, bullseyes or combination break. Most of the time the impact will be the pinhead size chip and can be ignored. This edge Crack can be repaired in 15-30 minutes and is the easiest crack repair. Here are the steps:


Edge Crack with a pinhead chip impact only. See and follow photos above.


You can ignore this pin head size impact so start by drilling 1/8 of an inch in front of the point and tap a bullseye. You want the point of the crack to terminate into the bullseyes, which will happen when you tap the bullseye. If the crack runs through the bullseye you should drill and tap a bullseye again after you have finished and cured so you will want to be tedious with this step to avoid more work.


  1. Drill and tap your bullseye 1/8 of an inch in front of the point.


   2. Mount your Crack Master over the drill hole with 200 or 400 resin, vacuum and pressure.


   3. Place crack openers on the inside of the windshield perpendicular to the crack with the bolt on the crack approximately one-two inches from the point,

        turn the bolt and watch for the medium resin to start flowing into the crack and stop, adjust for more pressure as needed. Be careful with a hot windshield.


    4. Fill the edge area with edge crack resin, hold and seal the resin bottle with an injector seal on the tip or use an injector against the top of the crack by hand and inject from the edge to the middle until the thick resin stops going into the crack. see pictures above.


    5. The slide the tool at the drilled hole with the 200 or 400 resin over the crack to where the edge crack resin stopped i.e. meet in the middle. Always observe the profile of the crack to watch the resin being injected and do not get ahead of the resin. Note the resin(s) must not spot and cannot shrink upon curing.


     6. Release the crack opener pressure. Always remove the crack opener bolt from the glass before tabbing and curing or you will alter the refractive index of

         the resin.


     7. Clean the windshield and you are done.


You must observe and examine the crack from its profile not the head-on angle.


D. Edge Crack with a Break Impact, i.e. Star, Bullseye, Combination-Break, etc

  • repairing an edge crack with a break impact

    Slide title

    Cover the Entire Break area with 2400 and cure it.

    Button

Pit Filling the entire break area will seal and separate the break so you can repair it using vacuum and pressure later.

Because an edge crack is surfaced and runs through the impact star or combination break you must be able to repair it like you do any normal star or combination break using vacuum and pressure.

Use 2400 because it will not seep into the break and clog it up. Cover the entire break area as in the picture and cure it. After you repair the crack, you will come back and repair this just like you do any other chip.

  • repairing the point of an edge crack

    Slide title

    Prepare the Point 

    Button

Prepare the Point by (a)drilling and tapping a bullseye and (b) place crack-openers on the inside of the windshield on the crack to pry open the crack.

The point of an edge crack is very different than the edge area. The point is closed up from the PVB bond to the glass. The crack is surfaced but there is no gap to speak of like there is at the edge area, so you must make a gap in with crack-openers in order to inject our structural adhesive crack resins that are stronger than new windshield glass.

NOTE: Vertical cracks are tighter than horizontal cracks and may require 3 crack openers instead of the normal 2 crack-openers with horizontal edge cracks.

  • inject edge crack resin up to the covered break

    Slide title

    Inject Edge Crack Resin up to the Cured 2400 Resin over the Break Area

    Button
  • inject edge crack resin from bottle tip seal

    Slide title

    Inject 2400 on both side of the cured resin covering the break.

    Button
  • slide the windshield crack repair tool down the windshield crack

    Slide title

    Slide the tool at the point to where the edge crack resin stopped flowing.

    Button
  • Tab and curing a crack

    Slide title

    Tab and cure the crack

    Button
  • slice the cured resin off of the repaired crack

    Slide title

    Slice the cured resin off the crack but leave the resin covering the break.

    Button
  • drilling at the impact point of the break

    Slide title

    Drill thought the cured 2400 resin at the imact point.

    Button

Inject Edge Crack Resin from the Edge up to the Cured 2400 covering the impact break area.

Click on the arrow in the middle of the picture on the right side in the picture to advance to the next picture.


Using the injector seal on the resin bottle tip or an injector, slide from the edge in until you reach the cured 2400 resin covering the break.

Next Picture -Go around the cured 2400 resin and inject the crack on the other side of the cured 2400 resin until the resin stops flowing from the gap in the crack becoming narrower as you go toward the point.

Next Step/Picture - Then slide the Wonder Bar Tool with 200 or 400 resin at the drilled hole at the point to where the edge crack resin stopped flowing. If using the Hybrid tool use 200 resin or 100 resin on a vertical crack. Vertical cracks are tighter than horizontal cracks.

Next Step/Picture- Remove all the tools including the crack-opener bolts off the glass. Tab the crack with 2400 and cure the crack.

Next Step/Picture -Slice off the cured resin with a razor blade at 45-degree angle but leave the cured 2400 covering the break.

Next Step - Drill through the cured 2400 resin covering the break at the impact point.

  • repairing the break impact of a long crack

    Slide title

    Repair the imact break like any other chip.

    Button

 Drill through the resin into the impact point. Place your windshield repair tool over the drilled hole and repair using vacuum and pressure.

Using the Wonder Bar Bridge Tool or Hybrid Tool repair the impact break just as you would repair any chip using vacuum and pressure and any of our chip resins that have 100% new glass strength. Then cure under pressure, pit fill the drilled hole, cure and slice off the remaining cured resin.

  • finished picture of a windshield crack repair

    Slide title

    Finished Repaired Edge Crack with a Combination-break impact.

    Button

 Finished Picture of the Edge Crack Reair with Combination-Break Impact.

A long crack with a break is two repairs and you should charge for 2 repairs. Example- $100 for the crack and $50-$75 for the break.


  1. You CANNOT ignore this impact break. You will be separating and sealing it so you can repair it just like any other stone break using vacuum and pressure. If you do not seal it, you cannot use vacuum and therefore cannot get a complete fill without drilling multiple times.
  2. then drill 1/8 of an inch in front of the point and tap a bullseye. You want the point of the crack to terminate into the bullseyes, which will happen when you tap the bullseye. Place your Crackmaster Windshield Repair Tool (the one with two suction cups) over the drilled hole using 200 or 400 cps resin
  3. Place crack openers on the inside of the windshield perpendicular to the crack with the bolt on the crack approximately one-two inches from the point.

        turn the bolt to adjust the needed pressure to inject the resin.

    4. Inject edge crack resin 2400 in the edge area going around the cured resin that is covering the impact break.

     5. When the edge crack resin stops flowing slide the tool at the point with 200 or 400 resin in it to where the edge crack resin stopped.

    6. Always remove the crack opener bolt from the glass before tabbing and curing or you will alter the refractive index of the resin.

    7. Place a bead of 2400 windshield repair resin and Mylar over the entire crack.

    8. Cure the windshield crack repair resin.

     9. Now you have to repair the impact break. Leave the cured 2400 windshield repair resin over the entire break area and at least ½ inch of both sides so that it is sealed. Because you have sealed it you can now repair just like any stone break repair. Drill through the resin into the impact point. Place your windshield repair tool over the drilled hole and repair using vacuum and pressure. Cure under pressure. Then pit fill the drilled hole and cure again.

 Note: All you have done here is turned the impact break into a normal stone damage repair by separating and sealing it.

     10. Clean the windshield and you are done.

Note: this repair is 2 repairs - the crack and the impact break. You should charge for 2 repairs.

E. The Floater Crack

The floater crack is a stone break that was ignored and cracked from temperature change, usually by the defroster, heat, cold or a car wash. This crack is pure negligence by the vehicle owner who should have had the stone break repaired. This crack does not run to the edge and is why it is called a floater crack because it is floating in the interior of the windshield and is usually horizontal.


This is the most difficult and time consuming crack repair. The steps do not have to be followed in order either and can depend on how many tools you have. In fact you may alter the steps after examining the crack and impact point. This crack does not have a gap like an edge crack nor the stress. It is tight and has two points and an impact break, which means you are not only going to repair the crack but have three stone break procedures to perform plus the crack. The impact is almost always a star, bullseye or combination break.


This repair can take 45-60 minutes. Best resin for a floater is 200 or 400 cps. Use 400 if the windshield is hot.  Fill as much of the crack as possible with. Sometimes you can only get 200 cps in. 


1. One Windshield Repair Tool and One Crack Opener.


  1. Drill and tap a bullseye at the points. Place a tool at the point(s); vacuum and pressure.


    2. Multiple crack openers will make a floater crack repair much easier. If you only have one use Vaseline on the suction cups so you can slide the crack

        opener if necessary. Place a crack opener(s) approximately 1-3 inches from the point(s). Prepare and mount your sliding injector tool and slide along the

        crack.


    3. Go around the impact break and do not let any windshield repair resin seep into the break's bullseye.


     4. If you have only one tool you will need to stop when the windshield repair resin stops injecting near the other point. Cover the entire break area with a

          resin that does not seep into the break (2400) through the impact point, then cure. Do not scrape off


     5. You now have the original break separated and sealed, so that it is repaired just like a normal stone break using vacuum and pressure. Drill through the

           windshield repair resin into the impact point, repair and cure.


      6. Repair the other point just like a stone break and cure.


       7. Scrape off, clean up and you are done.


2. Two Windshield Repair Tools and Two Crack Openers


  1. Drill and tap a bullseye at the points. Place a tool at the points; vacuum and pressure.
  2. Place a crack opener approximately 2-3 inches from each of the points and adjust the pressure bolt.
  3. Prepare and start sliding your injector tool along the crack.
  4. Go around the impact break and do not let any windshield repair resin seep into the break's bullseye.
  5. Cover the entire break area with windshield repair resin that does not seep into the break (2400) through the impact point, then cure. Do not scrape off.
  6. You now have the original break separated and sealed, so that it is repaired just like a normal stone break using vacuum and pressure. Drill through the cured windshield repair resin into the impact point, repair and cure.
  7. Scrape off, clean up and you are done.


3. Easiest Method - Two windshield repair tools and Four Crack Openers.


  1. Drill and tap a bullseye at the points. Place a tool at the points; vacuum and pressure.
  2. Place a crack opener approximately 2-3 inches from each of the points and adjust the pressure bolt and then another one on each side a few inches from the one nearest the tip/point.
  3. Prepare and start sliding your injector tool along the crack.
  4. Go around the impact break and do not let any windshield repair resin seep into the break's bullseye.
  5. Cover the entire break area with windshield repair resin that does not seep into the break (2400) through the impact point, then cure. Do not scrape off.
  6. You now have the original break separated and sealed, so that it is repaired just like a normal stone break using vacuum and pressure. Drill through the cured windshield repair resin into the impact point, repair and cure.
  7. Scrape off, clean up and you are done.


For more repair tips go to our newsletter website Windshield Repair Journal.


E. The Priming Method

Priming a crack can increase the adhesive bond to the glass. It is only necessary when the glass is cold.


There are two general types of repair failures:


  1. Cohesive failure: The resin splits and sticks to the sides or walls of the crack. The appearance is spotty.


    2. Adhesive failure: The resin pulls away from the side(s) of the crack. This type of failure will look as if the crack has never been repaired, and it can be  re-repaired.


Using our crack resins eliminate cohesive failures.


Inject the edge area of the crack using a primer (45 cps for a cold windshield and 90 cps for a hot windshield). Re-inject the remainder/edge section with a crack resin. Working from the middle toward the edge will push the primer out of the gap better than working from the edge to the point.

LONG CRACK REPAIR PATENT #5,116,441 and CIPs
RESIN = LOWER AT THE POINT THICKER IN THE REMAINDER and EDGE
Low Viscosity High Viscosity
POINT RESINS: 200-400 CPS EDGE RESINS:1600-2400 CPS
Medium Viscosity -200 - 400-800
MIDDLE OF THE CRACK RESINS: 200 -400 CPS

LOW VISCOSITY RESINS:

20 CPS: Is a thin, low viscosity windshield repair resin. This windshield repair resin is used to remove a "runner" (covered under Trouble Shooting). 20 cps can also be used to remove any spots you notice in the crack after you have cured it.


PRIMERS & POINT RESINS: All primers and long crack resins are compatible.


45 CPS (PRIMER-POINT RESIN) can be used as a point resin for the drilled hole  and tapped bullseye only but 400 is recommended or as a primer for any long crack. It is compatible with any long crack resin. You should use a primer in the edge area when the glass is cold. You can also use this as a stone damage/chip resin.


90 CPS (PRIMER and POINT) Point resin for the drilled hole and tapped bullseye and can be used for a stone damage repair on a hot windshield or any stone-break with the wonder bar bridge. 


*Primers are compatible with each other and with long crack resins.


LONG CRACK WINDSHIELD REPAIR RESINS:

200 CPS: For use in the point including the drill hole and tapped bullseye of an edge cracks and  floater cracks. Use above 40 degrees


400 CPS: For use in the point including the drill hole and tapped bullseye and the middle section of an edge crack. Also use for a floater crack. Use above 70 degrees.


1600 CPS: Use for the edge section of an edge crack which is the first 4 inches from the edge of the windshield. Works best at 70 degrees and above. If used below room temperature, it will need to be warmed or it will not wet the glass well. If you cannot warm the glass, then the edge area (4-5 inches from the edge) should be primed with the 45 resin.


2400 CPS: For use in the edge section of an edge crack which is the first 4 inches of the edge crack when the glass is hot - 85 degrees and above. Prime the edge area first when the glass is below room temperature or cooler with 45 cps. Also use in the edge rea when the impact break is a star or combination break in order to separate and seal the break off so it can be repaired after you repair and cure the long crack.


 *Long crack windshield repair resins are all compatible with each other and with the primers.


HELPFUL HINTS

Always fill the crack with the thickest resins possible.


Compatibility means they can be mixed in the cylinder or injected on top of, or next to, one another. Once a resin is cured, any other resin can be injected or placed next to it.


Heating crack resins or the windshield when below room temperature will increase the bond to the glass.


Injecting a primer in the edge area when the glass is cold and then re-injecting a crack resin in the edge/remainder will increase the bond to the glass by improved wicking and wetting.


1600 AND 2400 cps must be used at or above room temperature or they must be heated. This is done by heating the injector with blow dryer, heat gun or a soldering iron placed in the heating port hole of the injector. A butane solder iron is best if you are mobile.


ALLOW TIME FOR INTERACTION: Allow time for the resin to interact with the glass which is about two minutes. The higher viscosity crack resins you use, the more time this takes. . Using methods that start with an injector at the edge is best as this will allow the interaction time required while doing the repair since these methods can take up to 20 minutes.


CRACK CLEANING: Prime the crack with the  Xtra Bond adhesive promoter or the X-Phobic pre-treatment if you suspect there is Rain X.


Talk to the Customer

Explain the procedure of the windshield repair, making sure they understand that the windshield repair will not completely disappear. The appearance will improve, the repair will not crack further and it will save them money. Many insurance companies are paying for the repair (discussed further in newsletters at www.windshieldrepairjournal.com ) get information as needed.


Always find out how old the crack is - how long has it been on the windshield.


If the crack is more than 14" in length and has been there for more than 2 months, there is a good possibility that there will be some dirt in the crack that may show up in the repair. Clean the crack (refer to Helpful Hints) and use the priming method, but be sure to pass this information on to the customer.


Preparing The Vehicle

  1. Mobile: Have the customer move the vehicle into the shade. It is a bad habit to get into moving the car unless your liability insurance covers this for you. Remember you need "true" shade. If none is available use cardboard or Artist's board to shadow the windshield. Be sure the board is secured with something heavy, but soft.


    2. Place a thick towel on the hood of the vehicle and place your windshield repair kit on the towel to protect the car's paint from the windshield repair resin,

         and anything on your clothing that may scratch the car.


    3. Wash the area of the windshield around the crack. DO NOT SPRAY CLEANER INTO THE BREAK; IT WILL CONTAMINATE THE REPAIR.


Crack Repair Techniques

Objective: Completely fill the crack, preventing it from spreading any further, while achieving the best possible appearance.


Failures: Generally two types of failures occur with repairs:


1. Cohesive failure: The resin splits and is stuck to the walls or sides of the crack.

The appearance is spotty.


2. Adhesive failure: The resin pulls away from the side(s) or the crack. This type of failure looks as if it had never been repaired before and it can be re-repaired.


The use of our crack resins has eliminated cohesive failures when combined with a good technique. Normally adhesive failures occur in the winter months. The glass becomes cool during a repair even when using a 1600 or 2400 cps and the viscosity of these resins rise, preventing a good wet of the glass. During this season, we recommend the priming method, warm the glass whenever possible and keep your resin warm with a soldering iron placed in the heating port hole of your injector. Randomly check your crack repairs at 3 months, 6 months, 1 year and 2 years to see if you are noticing a cohesive or adhesive failure. If you are, a change in viscosity or method will eliminate the problems. It also lets your customer know you care about he work you did for the long term.

Film Tabs: The following methods of crack repair will require you to know how to use "Film Tabs". When told to do so, generously run resin (a long crack resin) along the area of the crack that has been injected with resin and place the tabs over it, butting them up against each other. There should be no bubbles or places not covered by the resin and tabs.


Methods: "Meet in the Middle" and the "Two-Step" are the most popular. You can use 200 or 400 at the point of the meet in the middle method. Then place your Crack Master with 200 or 400 on the drill hole. Turn you crack opener bolt until you see the resin start to go into the crack and then stop. The slowly proceed down the crack until you meet where your 1600 stopped. With 200 or 400 in the point you do not need to cure the point under pressure as you have to when you have 90 in the point because 200 and 400 is mechanical (thick) enough to stay on the PVB upon curing. There are times when the crack is tight and you will have to use 90 at the point but pick up with the 200 or 400 as soon as possible.


Crack Repair Techniques

The Crack Opener is used on the inside of the windshield to pry open the crack. Lubricate the suction cups and mount perpendicular to the crack with the bolt right on the crack about 1-2 inches from the point. Slowly begin to tighten the bolt of the Crack Opener against the crack. You will begin to see the resin start to flow. Stop tightening when this occurs. Multiple crack openers are better than sliding one crack opener along the crack. Proper length with the proper size and durometer of suction cups opens the crack symmetrically and without spreading of the crack..

METHODS FOR REPAIRING SPECIFIC CRACKS (UNSURFACED, "Y" CRACK, CRACK OFF STAR BULLSEYE)


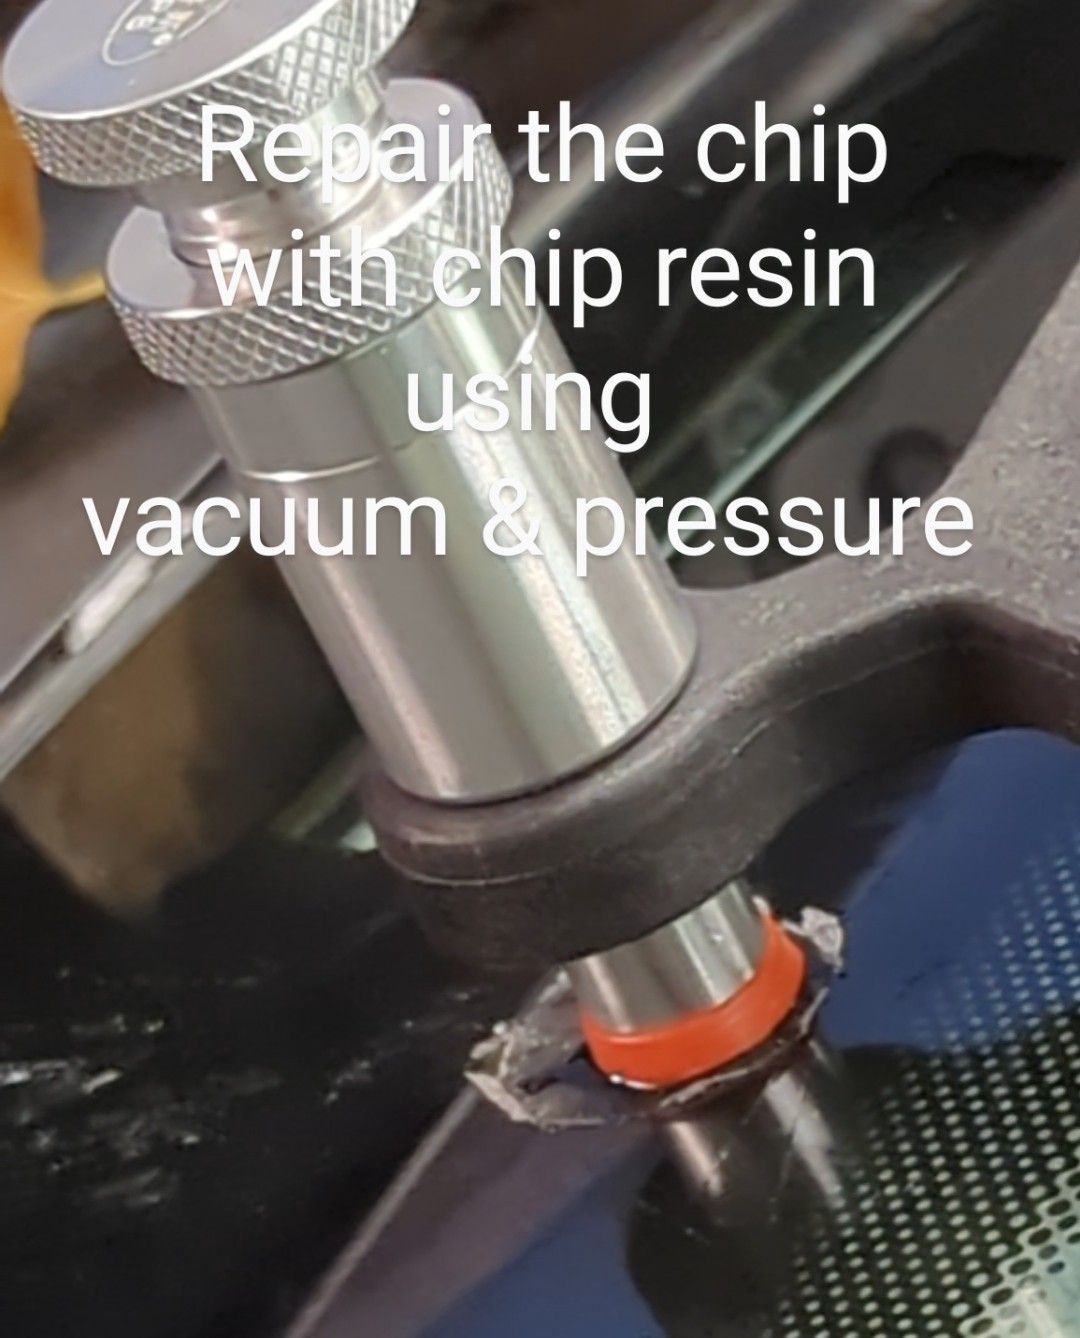
Unsurfaced Crack: Repair using vacuum and pressure.

The unsurfaced crack is very rare. It does not begin or end at an edge of the glass and is therefore also called a "floater".


  1. Drill a hole at one of the points and tap a bullseye.


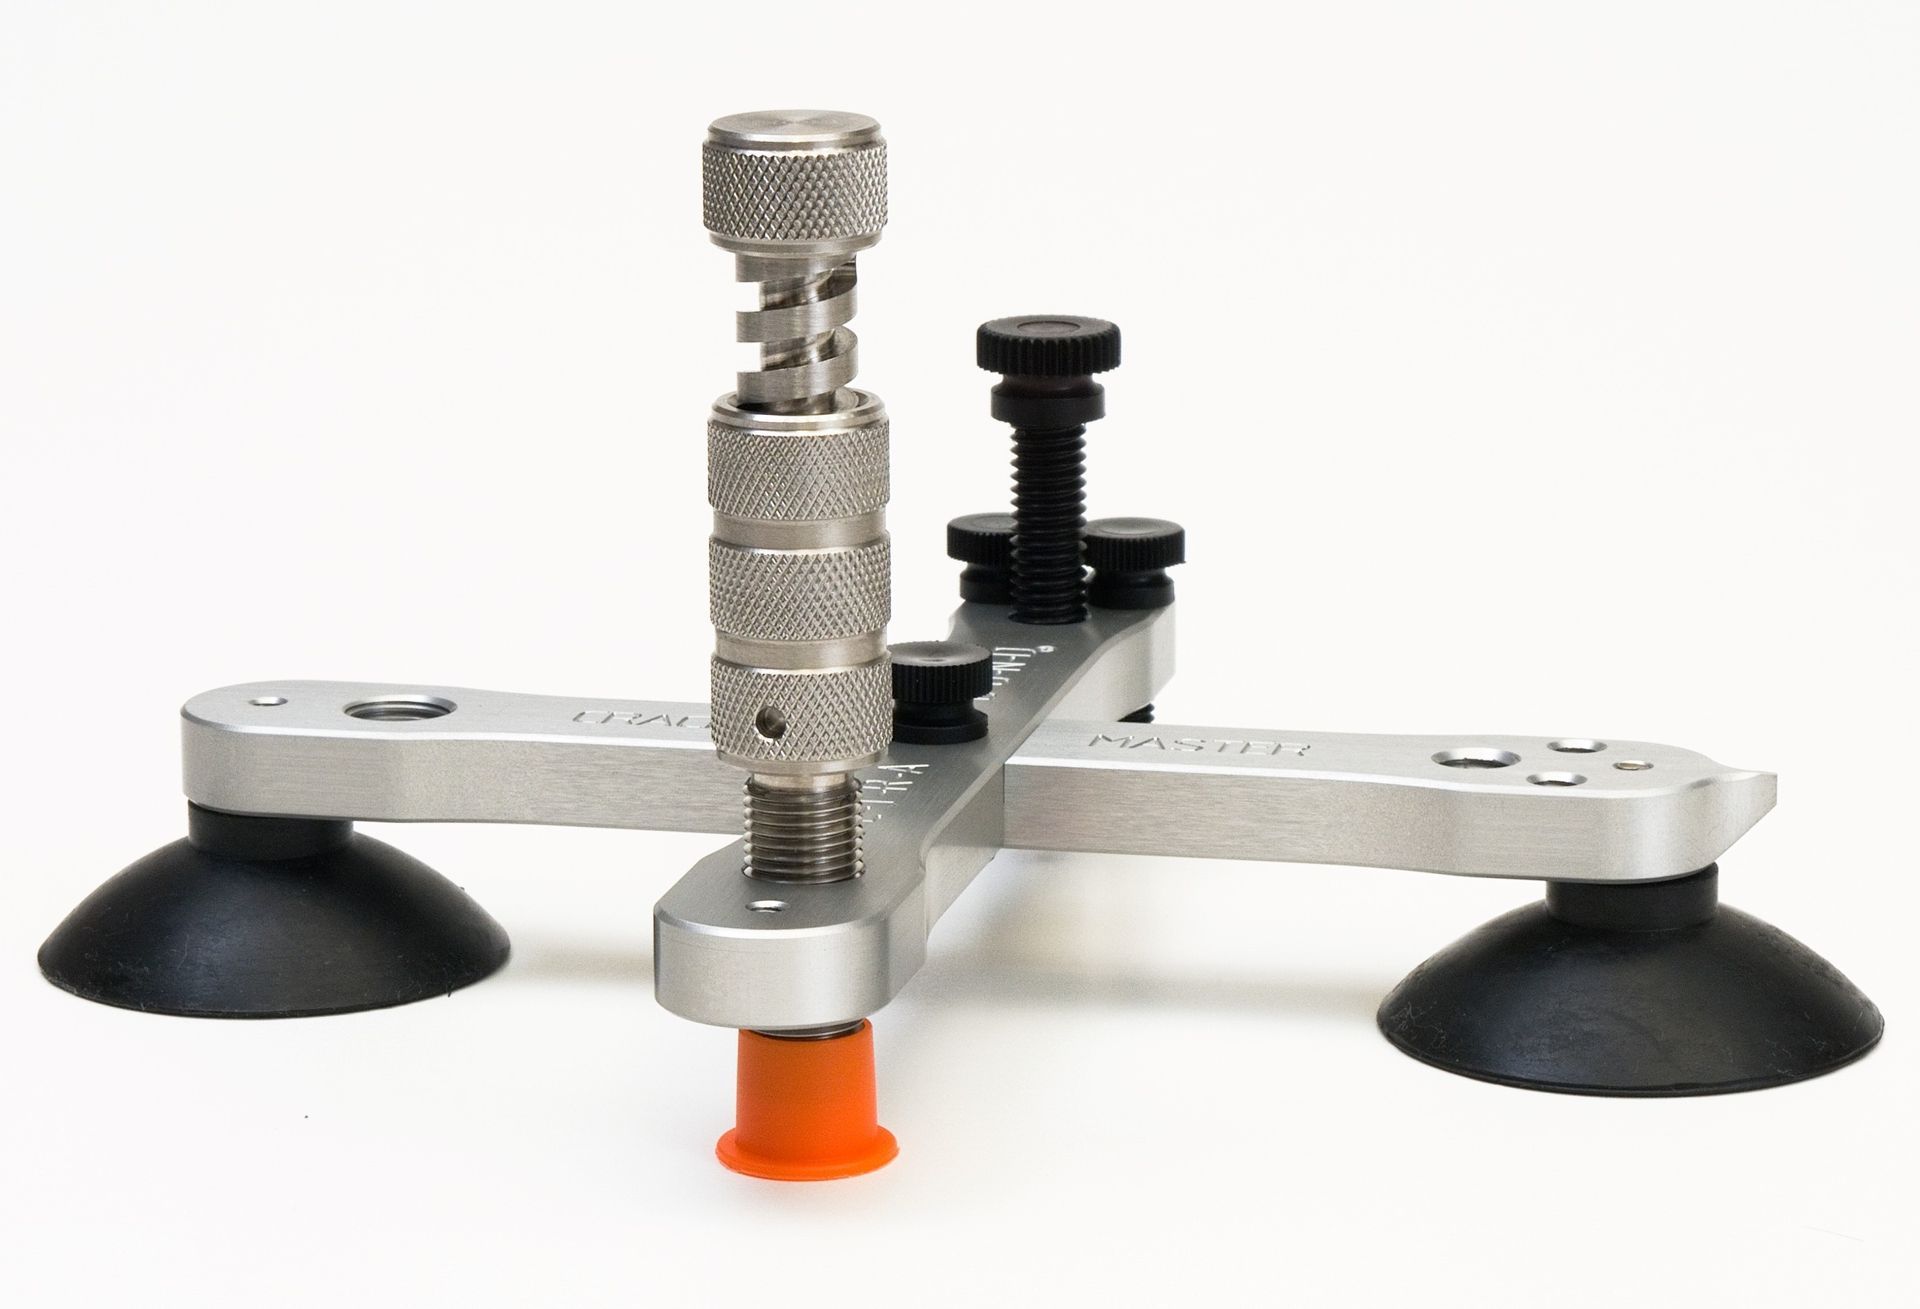
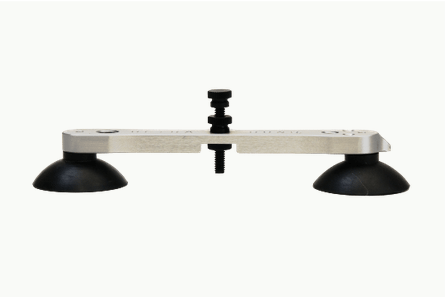
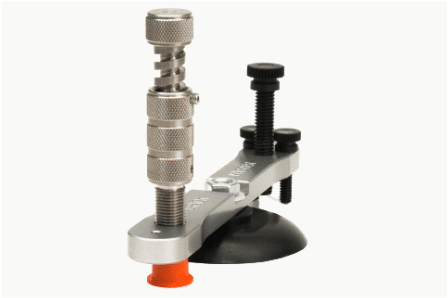
   2. Prepare your Bridge structure and fill the bullseye with a low viscosity windshield repair resin (45-100 cps) leaving the injector on pressure.


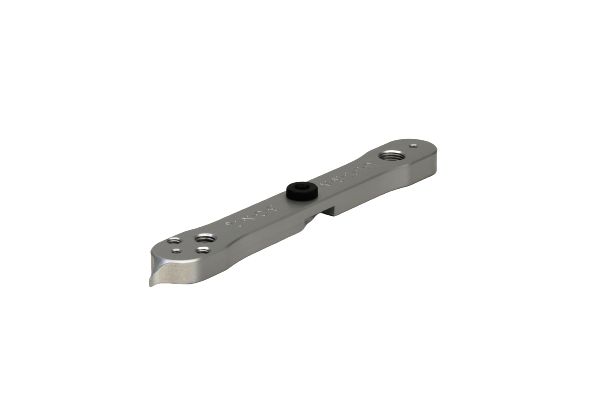
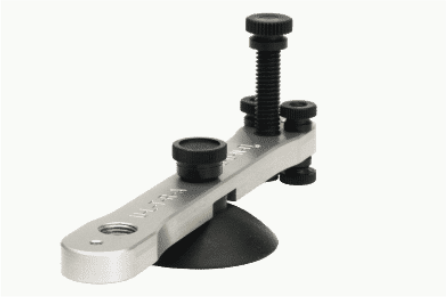
   3. Drill another hole 3-4" down the crack, tap a bullseye and mount your Long Crack Slider and injector also filled with a low viscosity windshield


   4. repair resin (about 4 drops) and leave it on vacuum. This is creating a pushing and pulling action between the two injectors


   5. When the resin from the 1st Crack Master (Classic) has reached the 2nd Crack Master switch the 2nd Crack Master injector to pressure.


    6. Remove the 1st Crackmaster. Drill another hole 3"-6" down from the 2nd injector and repeat steps 3, 4 and 5.


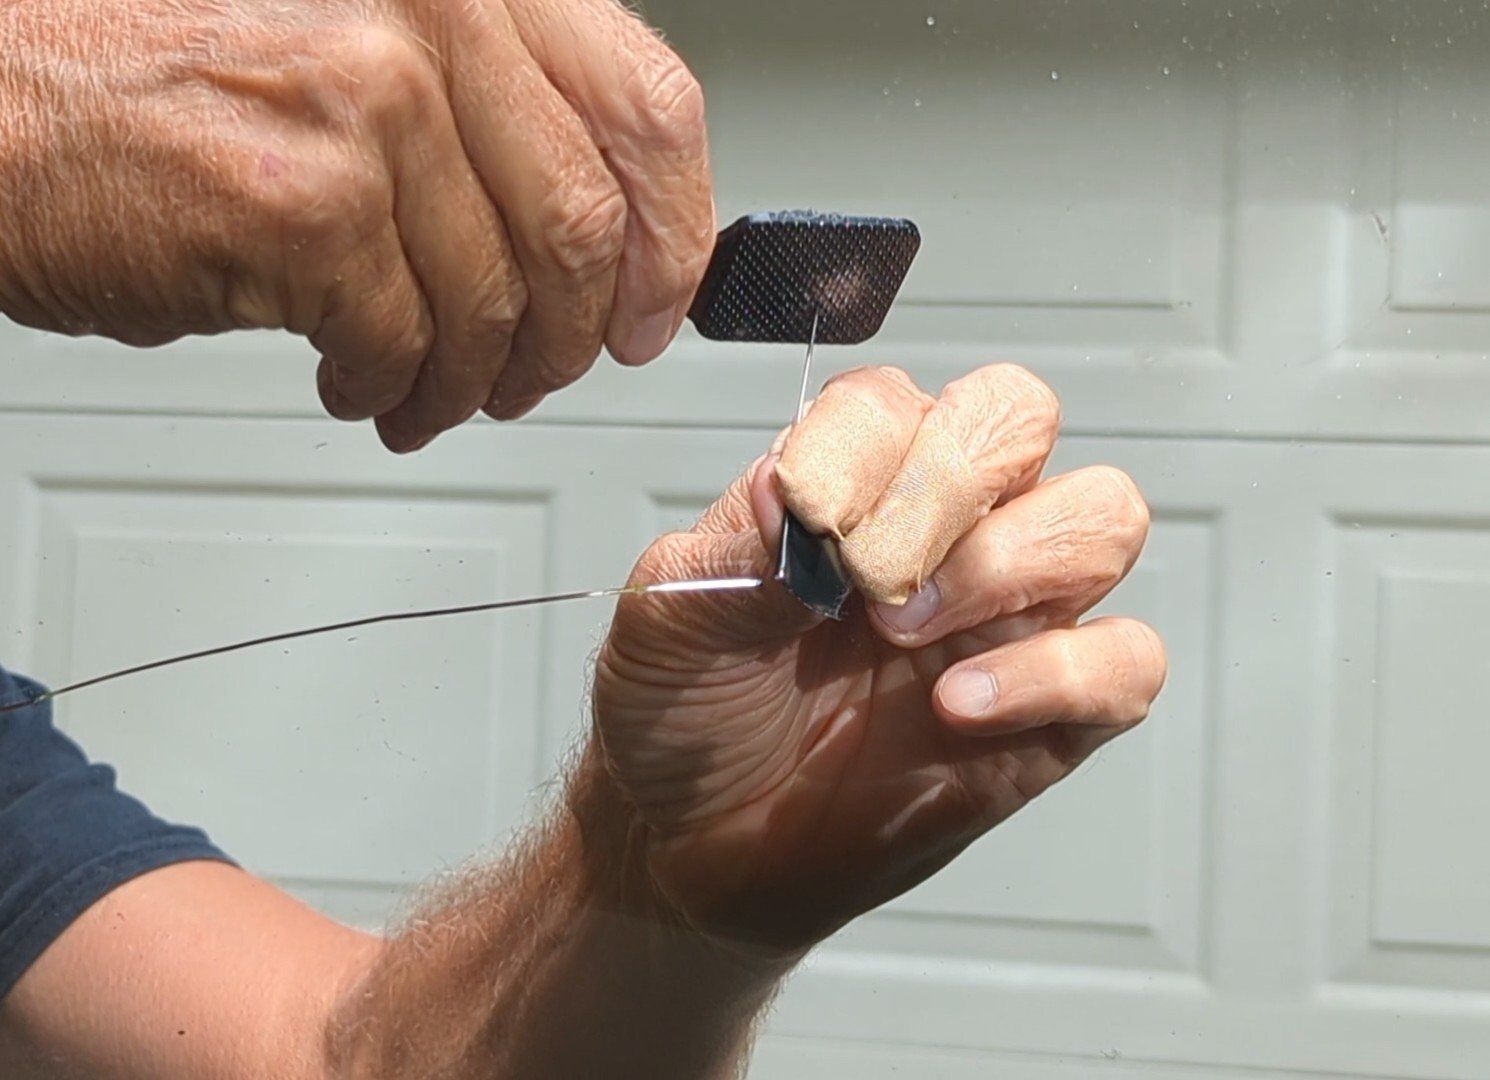
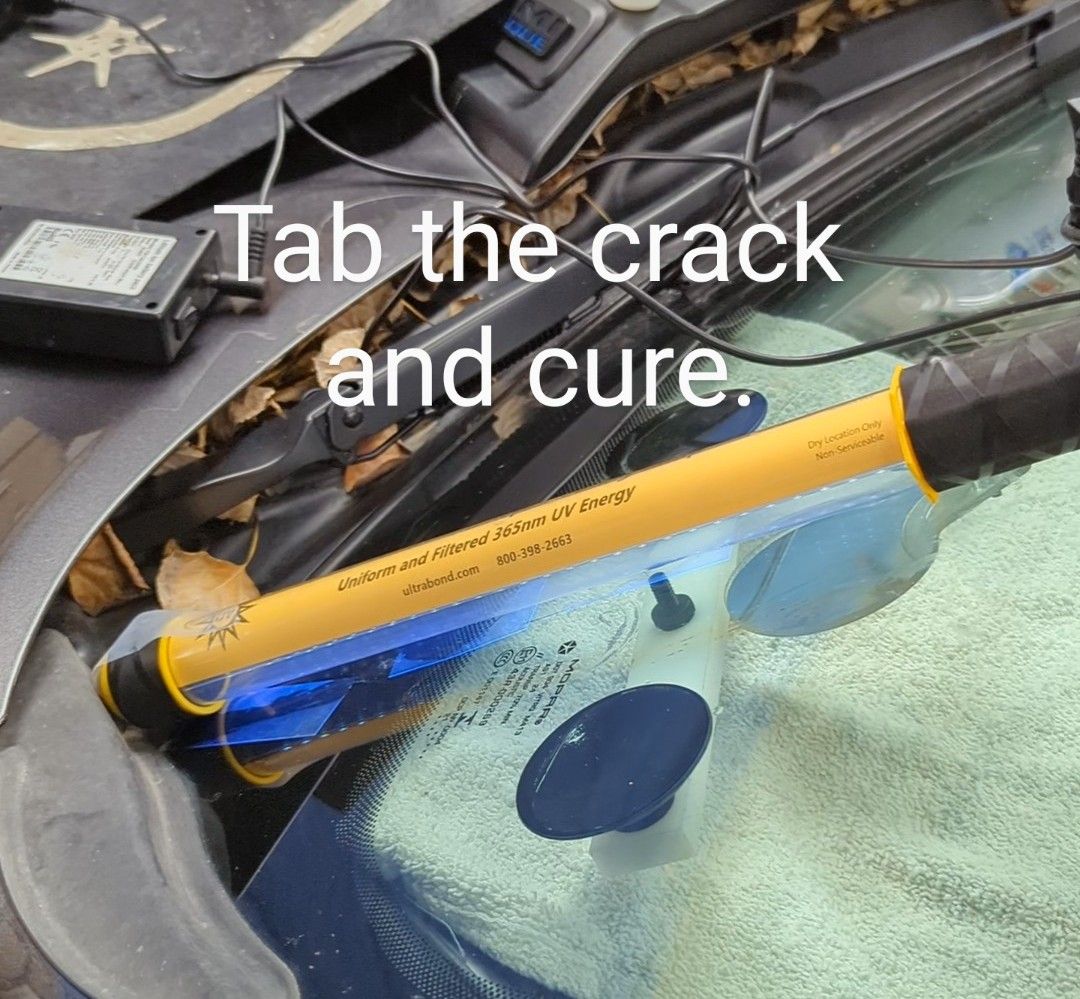
    7. When completely filled, tab and cure. * A 10" crack would require 3 drill holes.


THE "Y" CRACK


The "Y" Crack may look like a scary repair, but once you think about it as two separate cracks, it becomes quite simple. The "Y" crack off the side or horizontal can be repaired using any repair method. You will repair the bottom crack first stopping when it hits the joining crack and repairing the top section last. If you did the top portion first, you are taking the chance of getting resin into the bottom crack and preventing repair, or making it difficult.


  1. Repair the bottom crack first using any method and a low viscosity windshield repair resin and switching to a medium viscosity windshield repair resin. Stop at the apex or joint of the crack. Tab and cure.


   2. Repair the top crack as you would a normal single edge crack starting with a low viscosity resin at the point, switching to a medium, or high or both,

       depending on temperature. Tab and cure.


If the "Y" Crack is off the bottom, the 2 step works best.


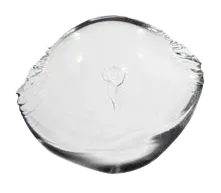
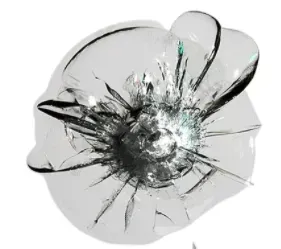
CRACK OFF A STAR OR BULLSEYE


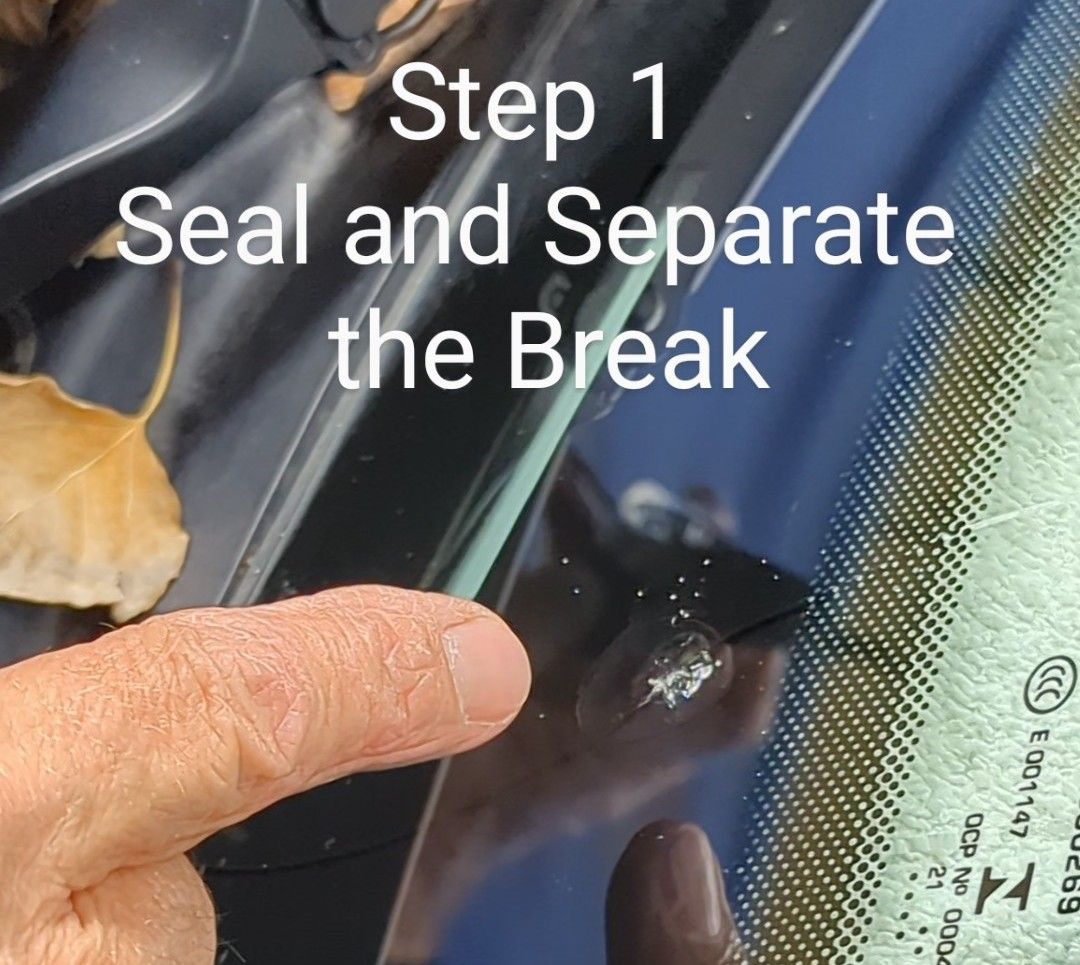
What makes this repair difficult is filling the star or bullseye because you are unable to create a vacuum because the crack has surfaced. Therefore, these instructions focus on filling the star or bullseye. Separating the break as previously instructed above is the best method. Here are some more methods.

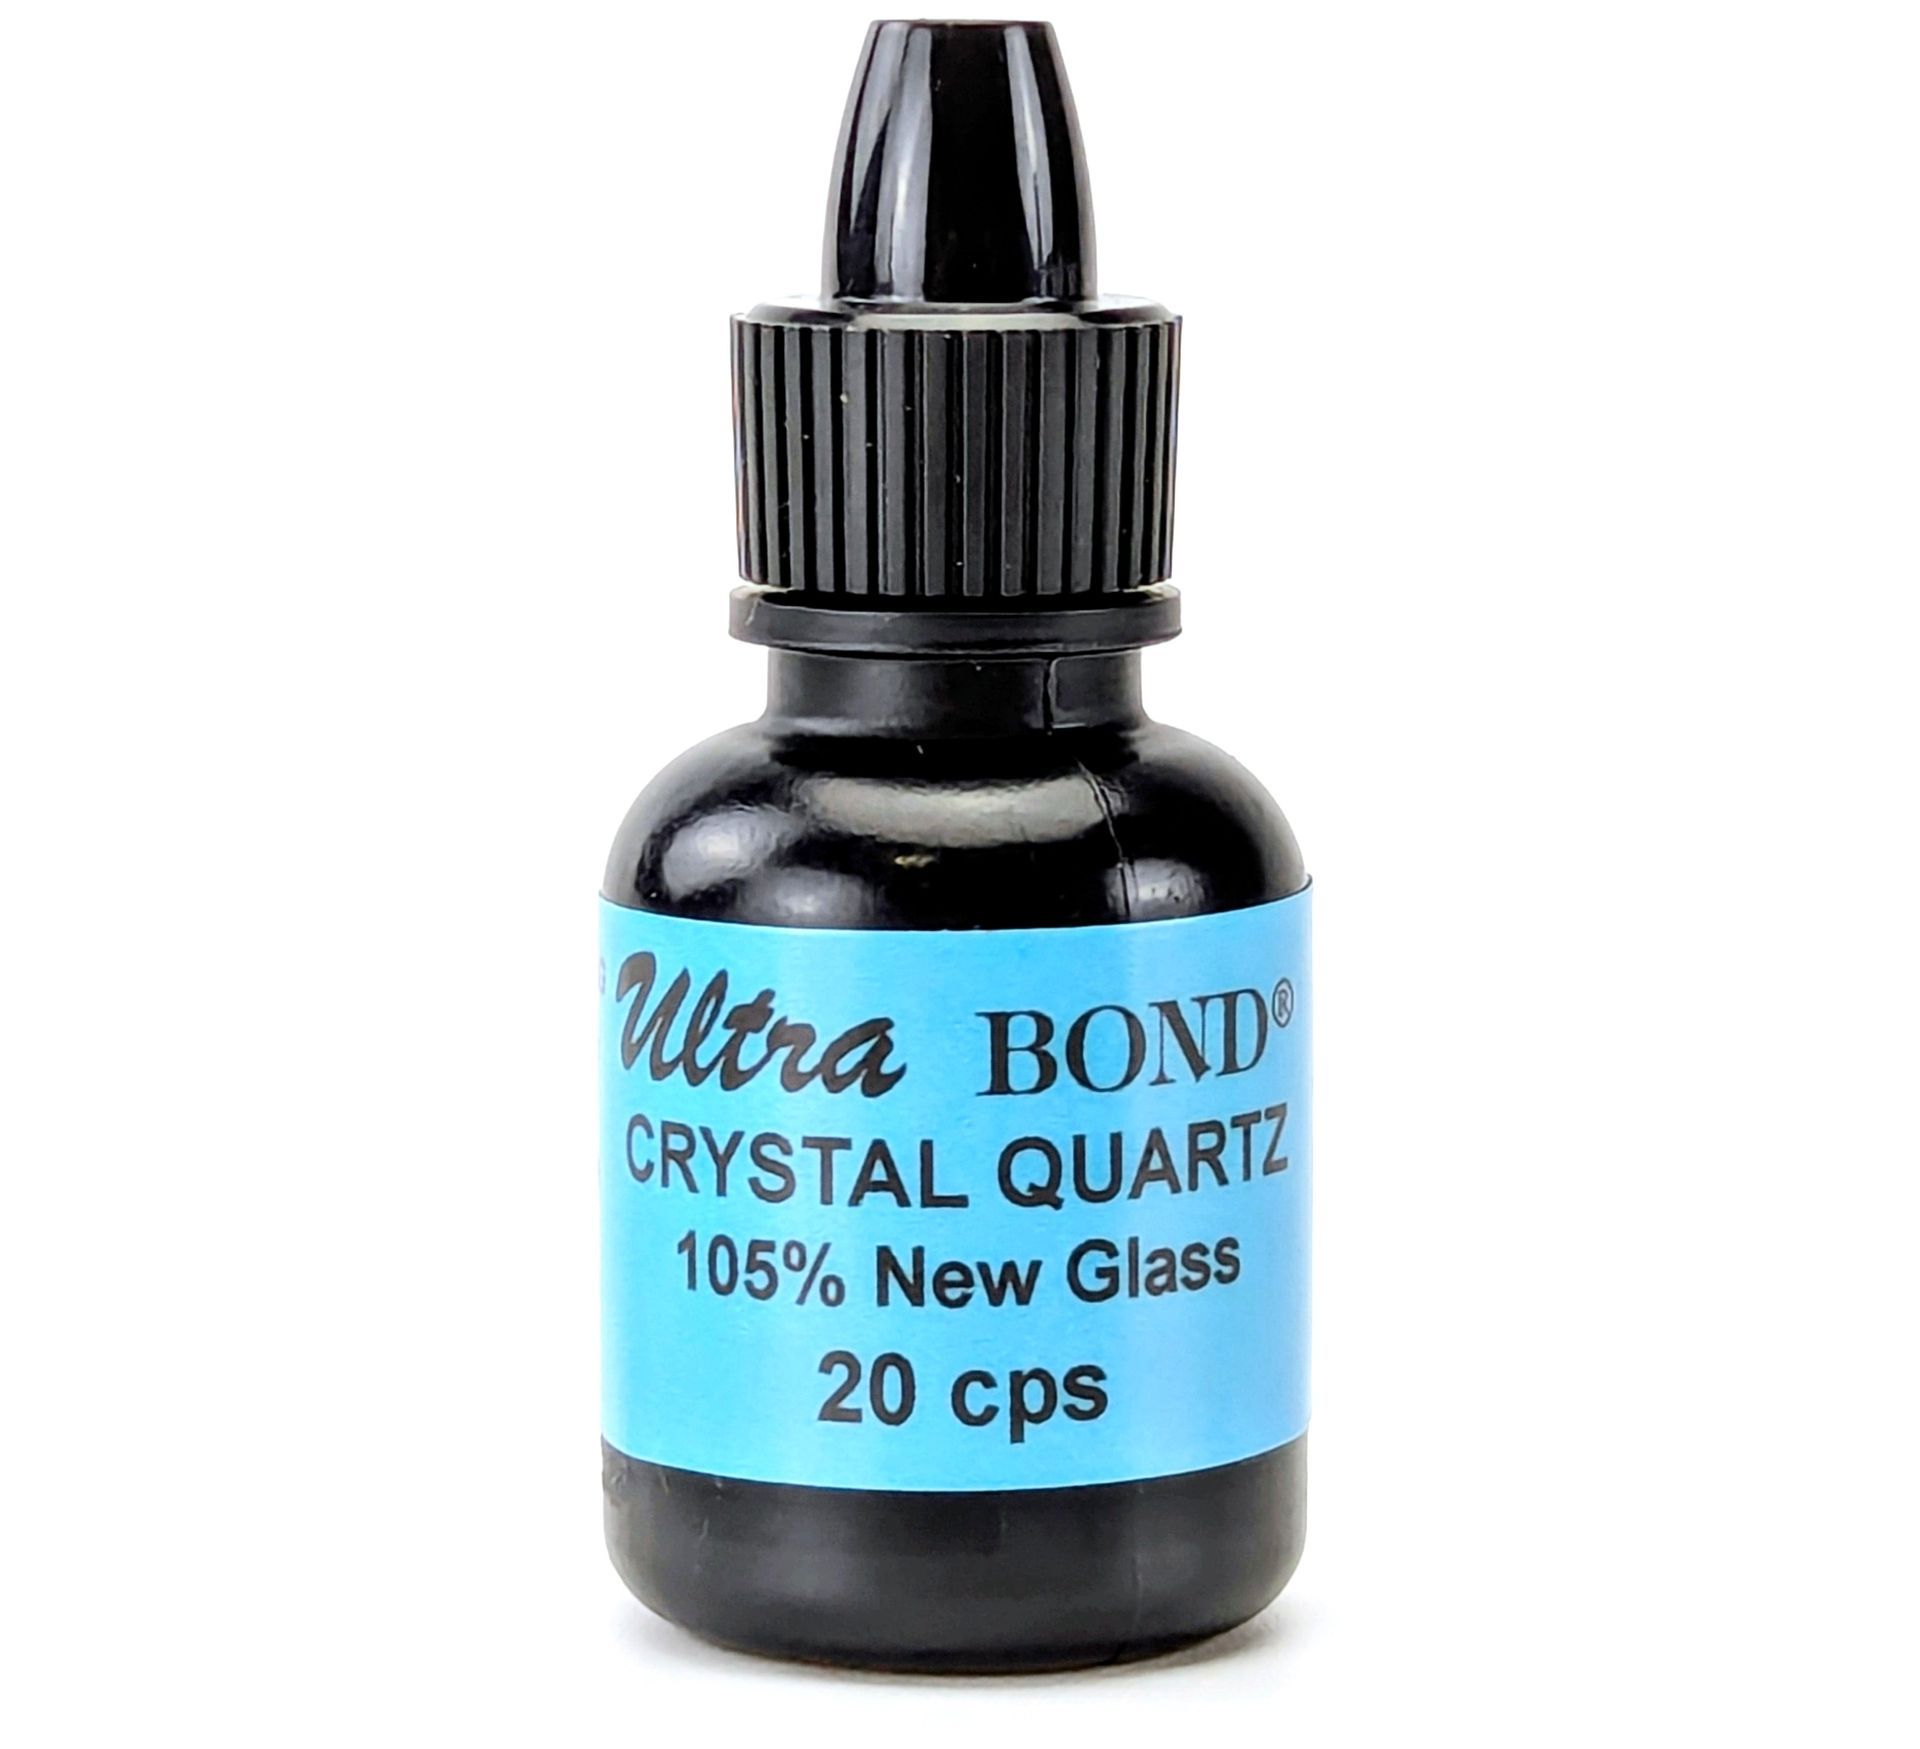
  1. If it is a small bullseyes roll a drop of 45 cps into the impact point, it will fill by capillary action while you are working on the rest of the crack.
     
    OR
     
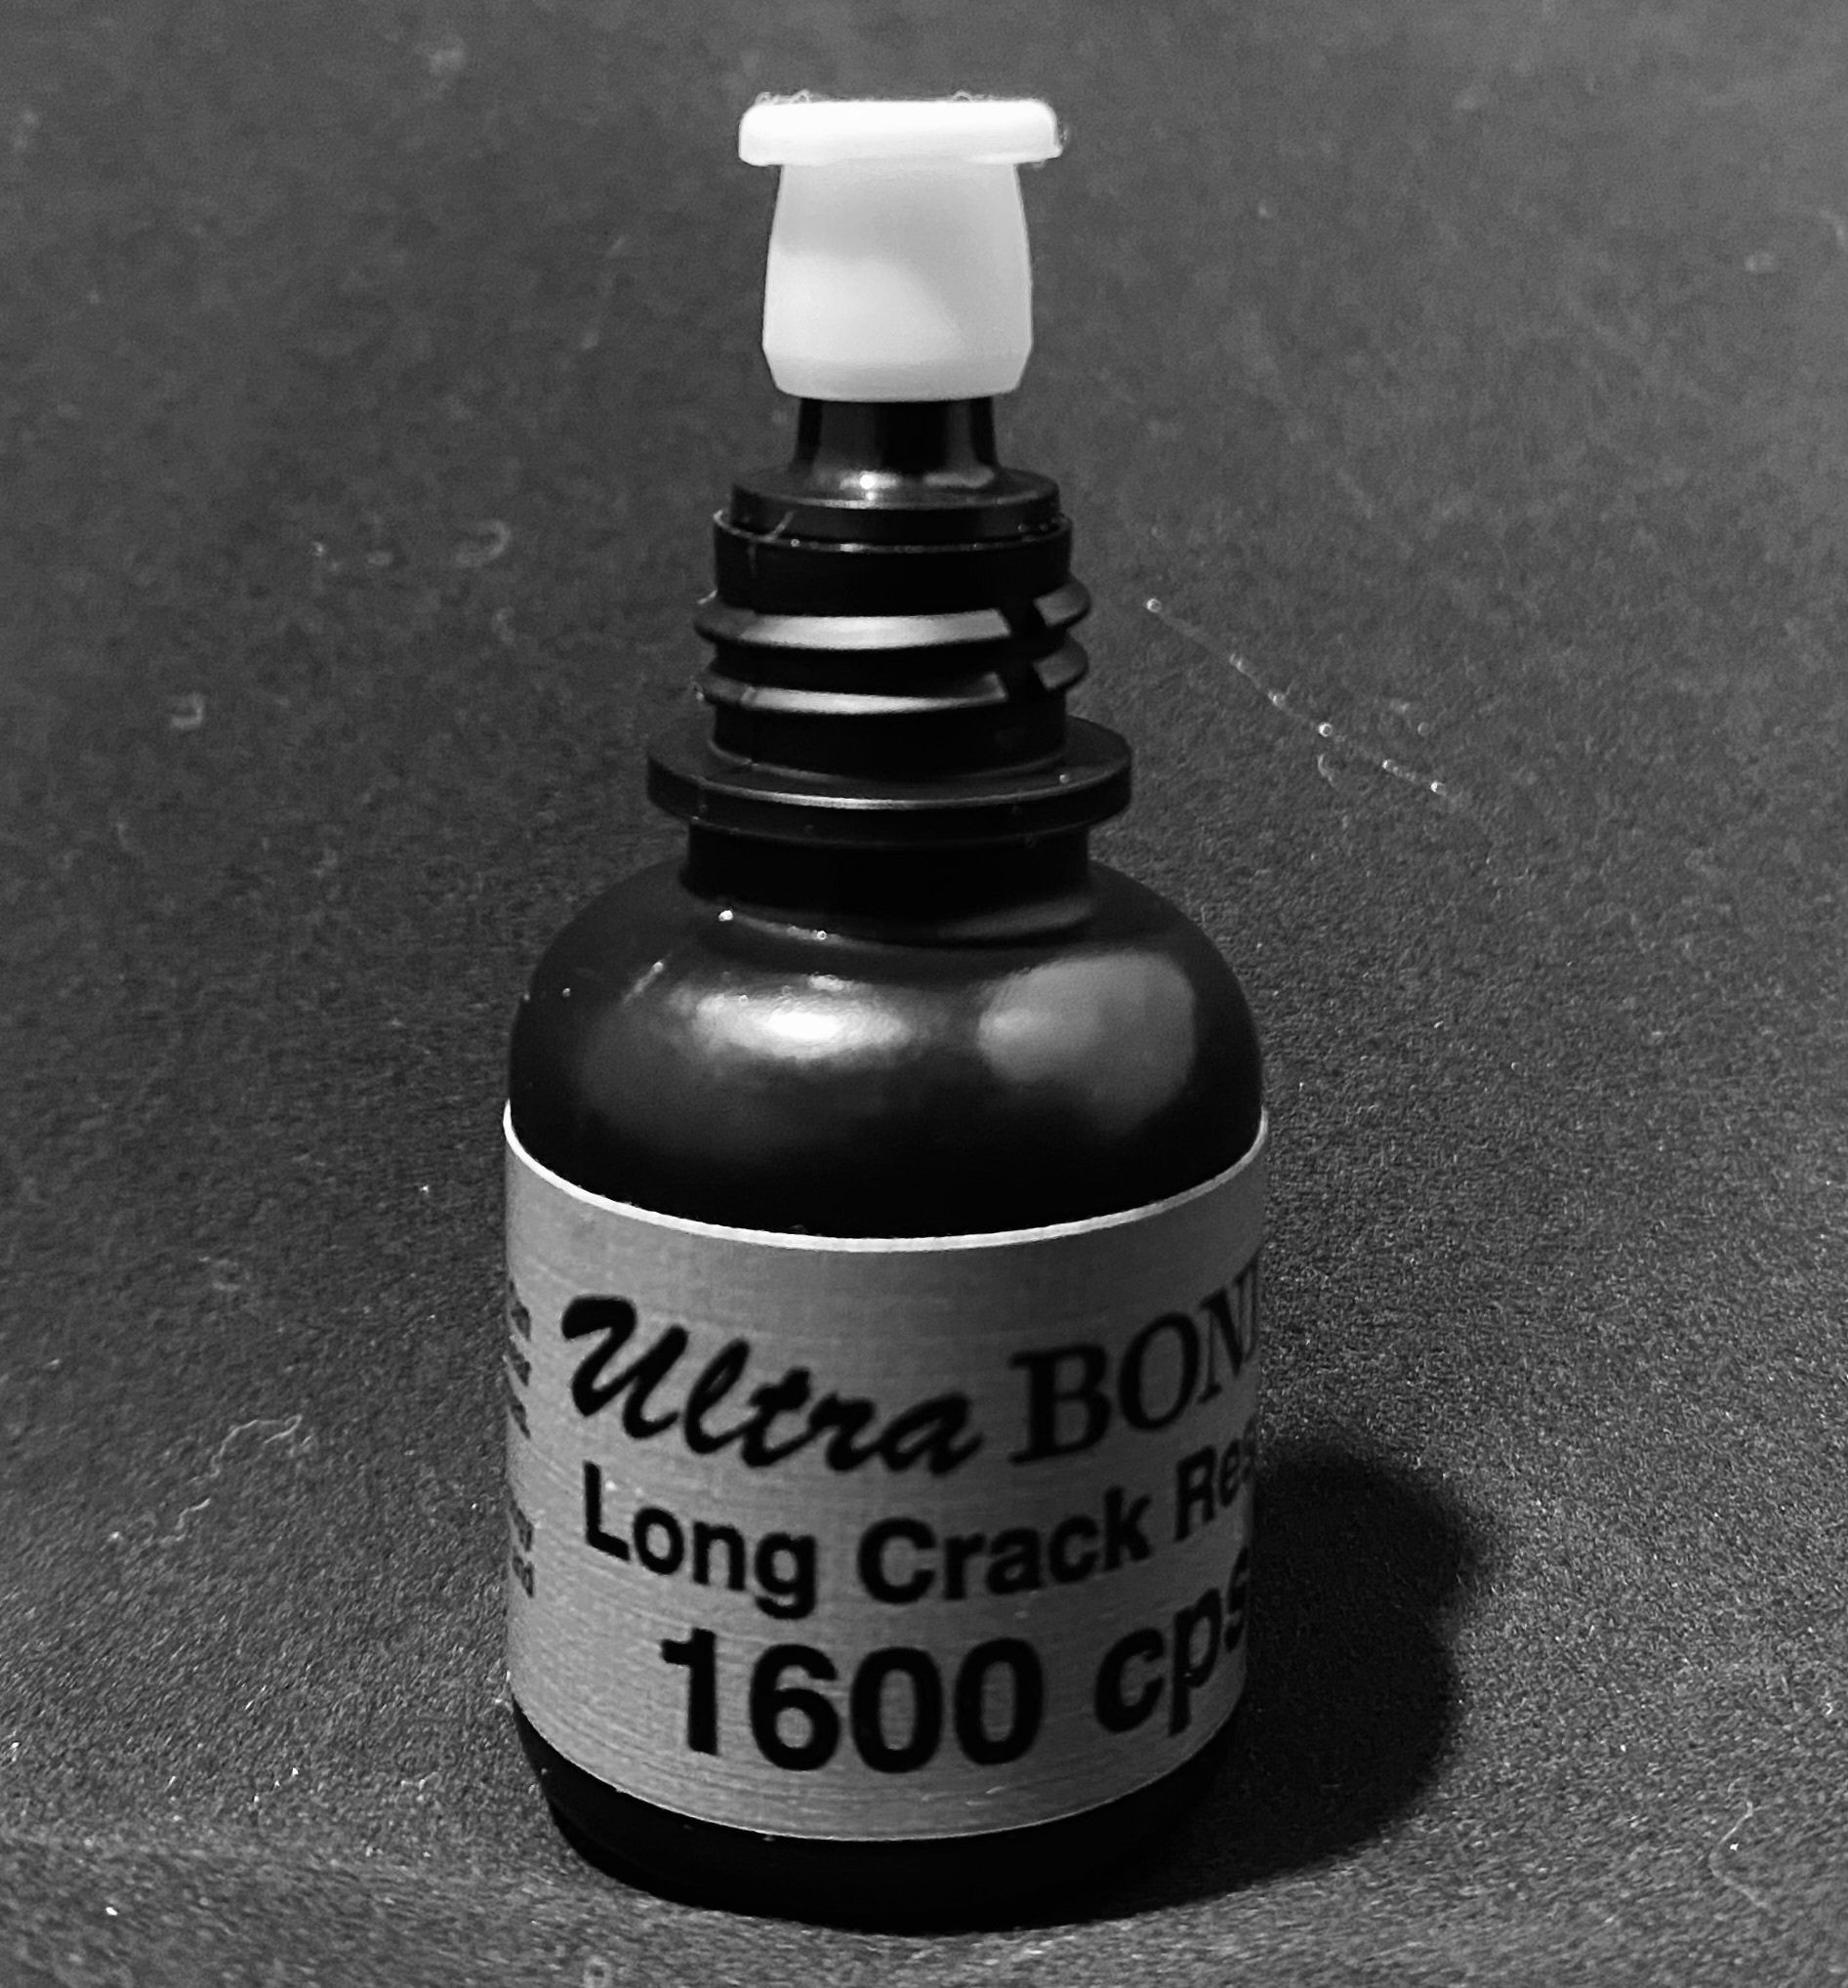
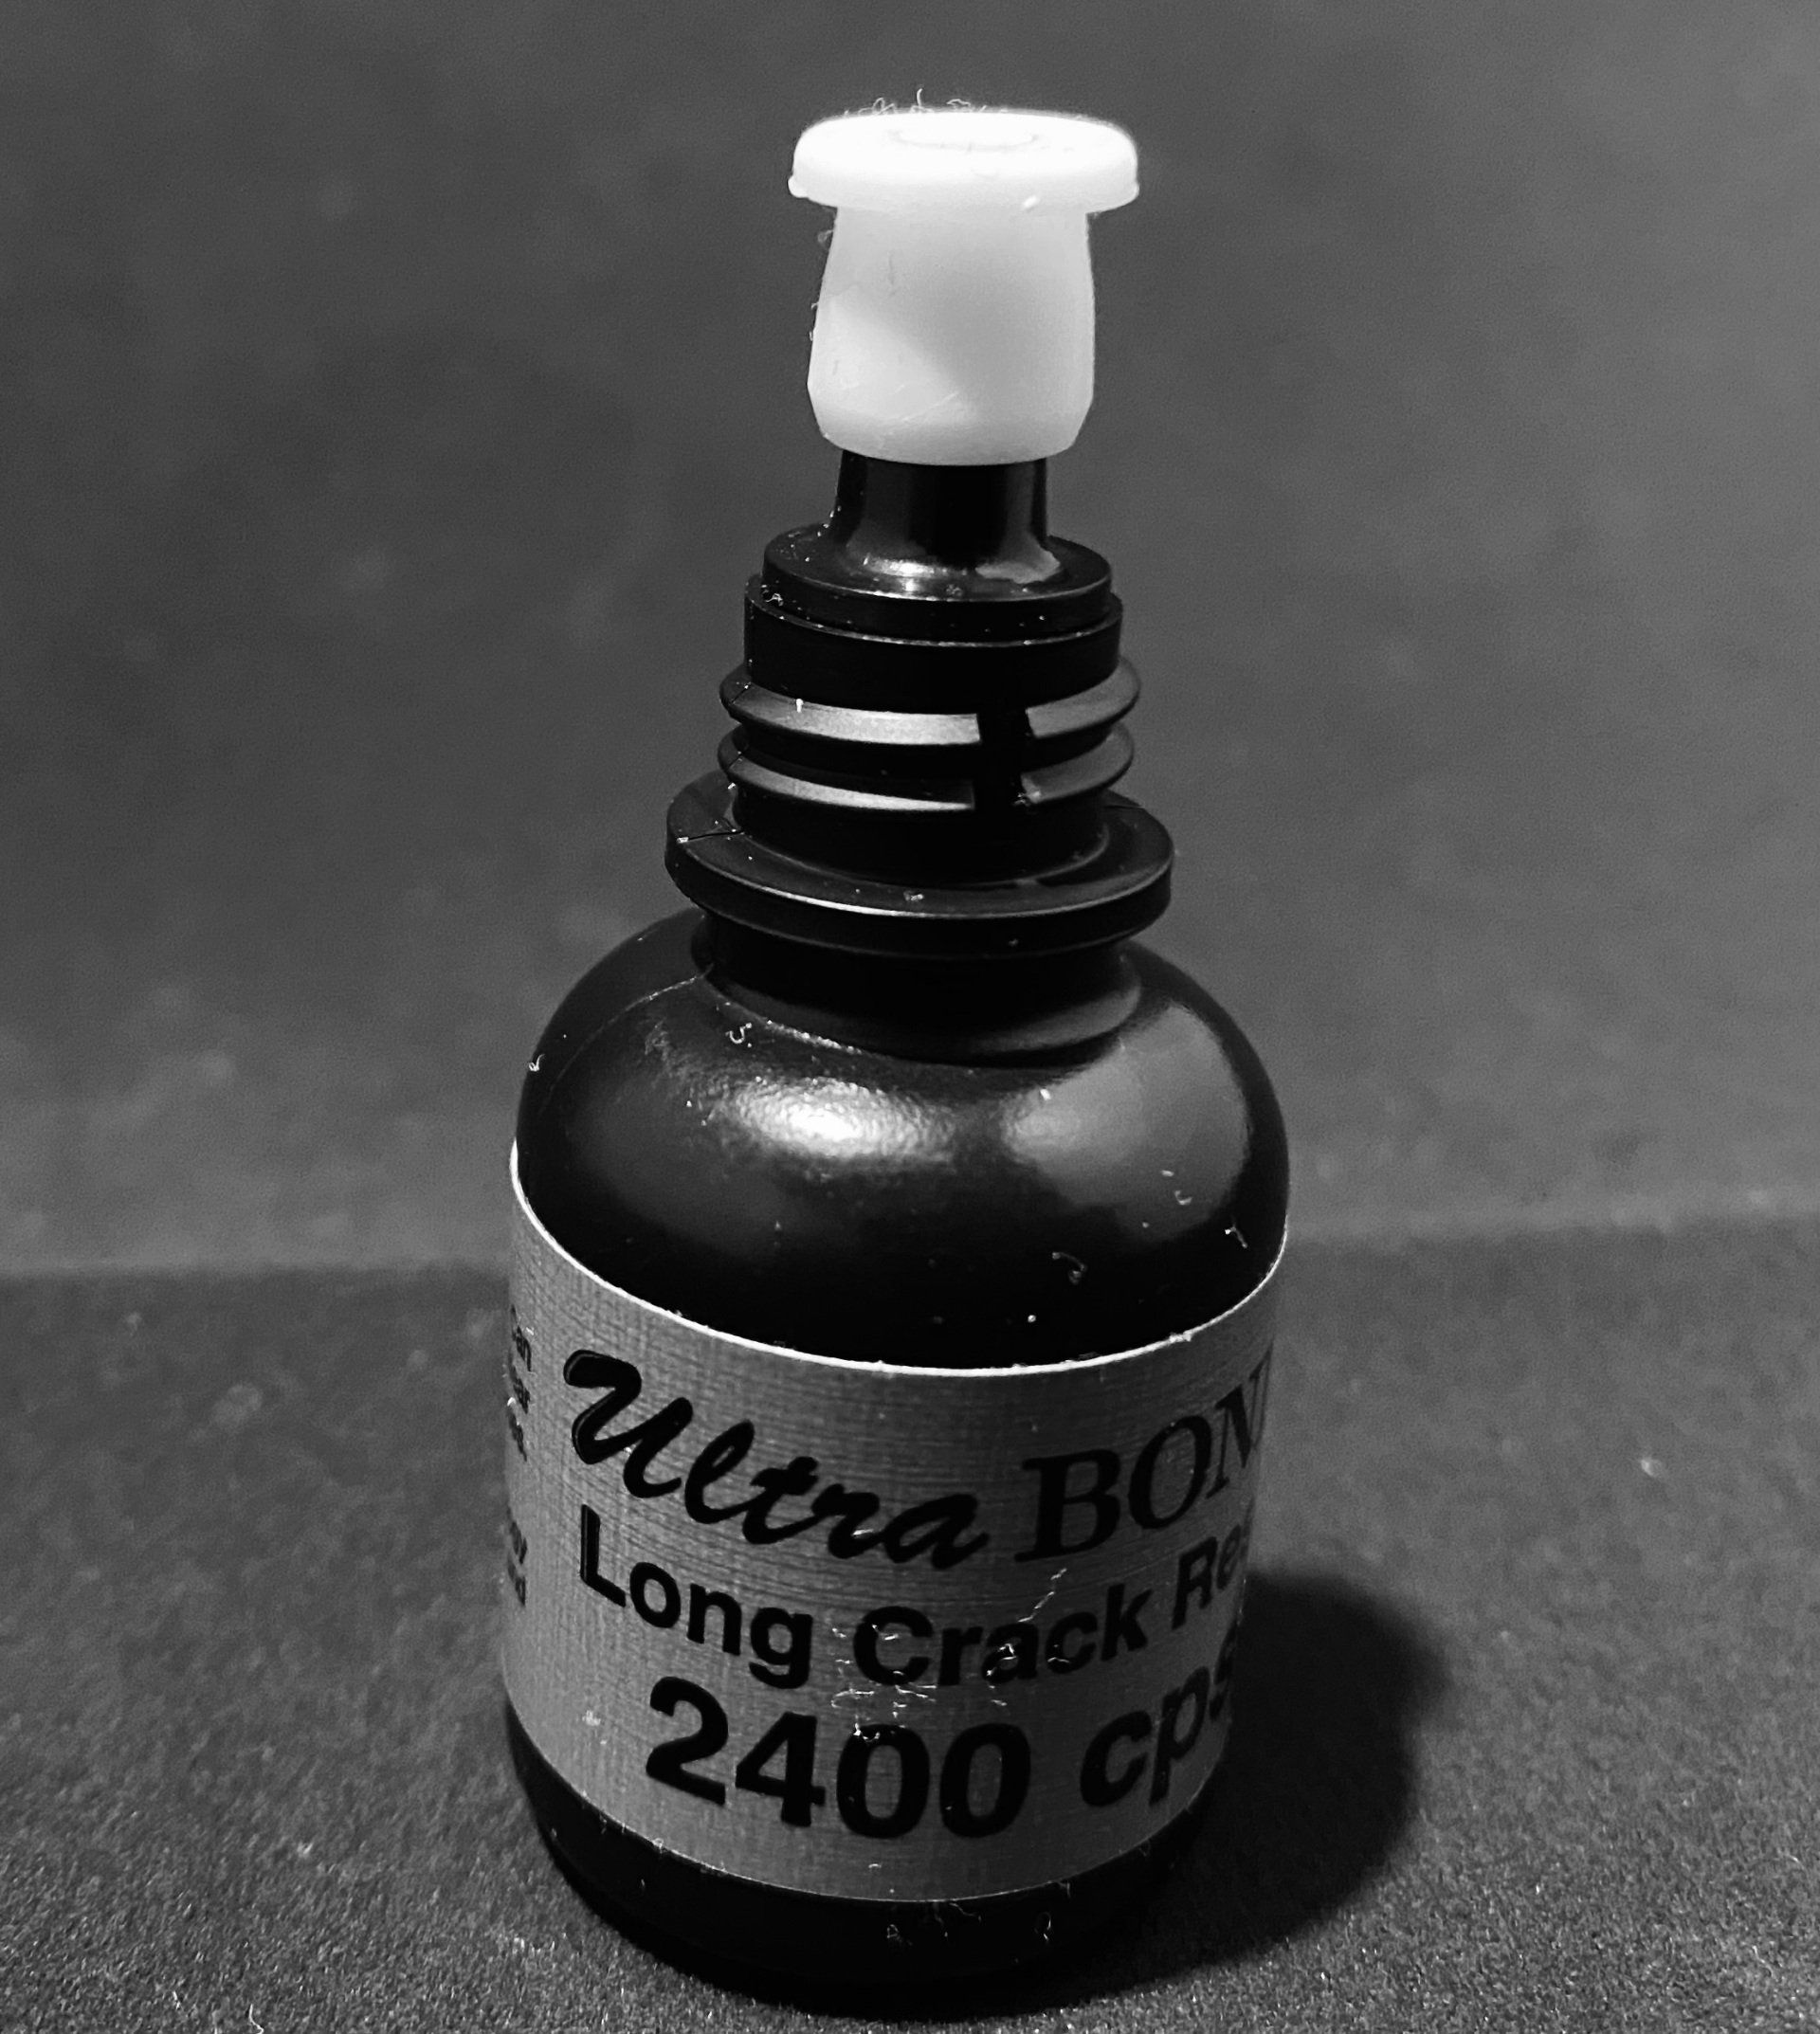
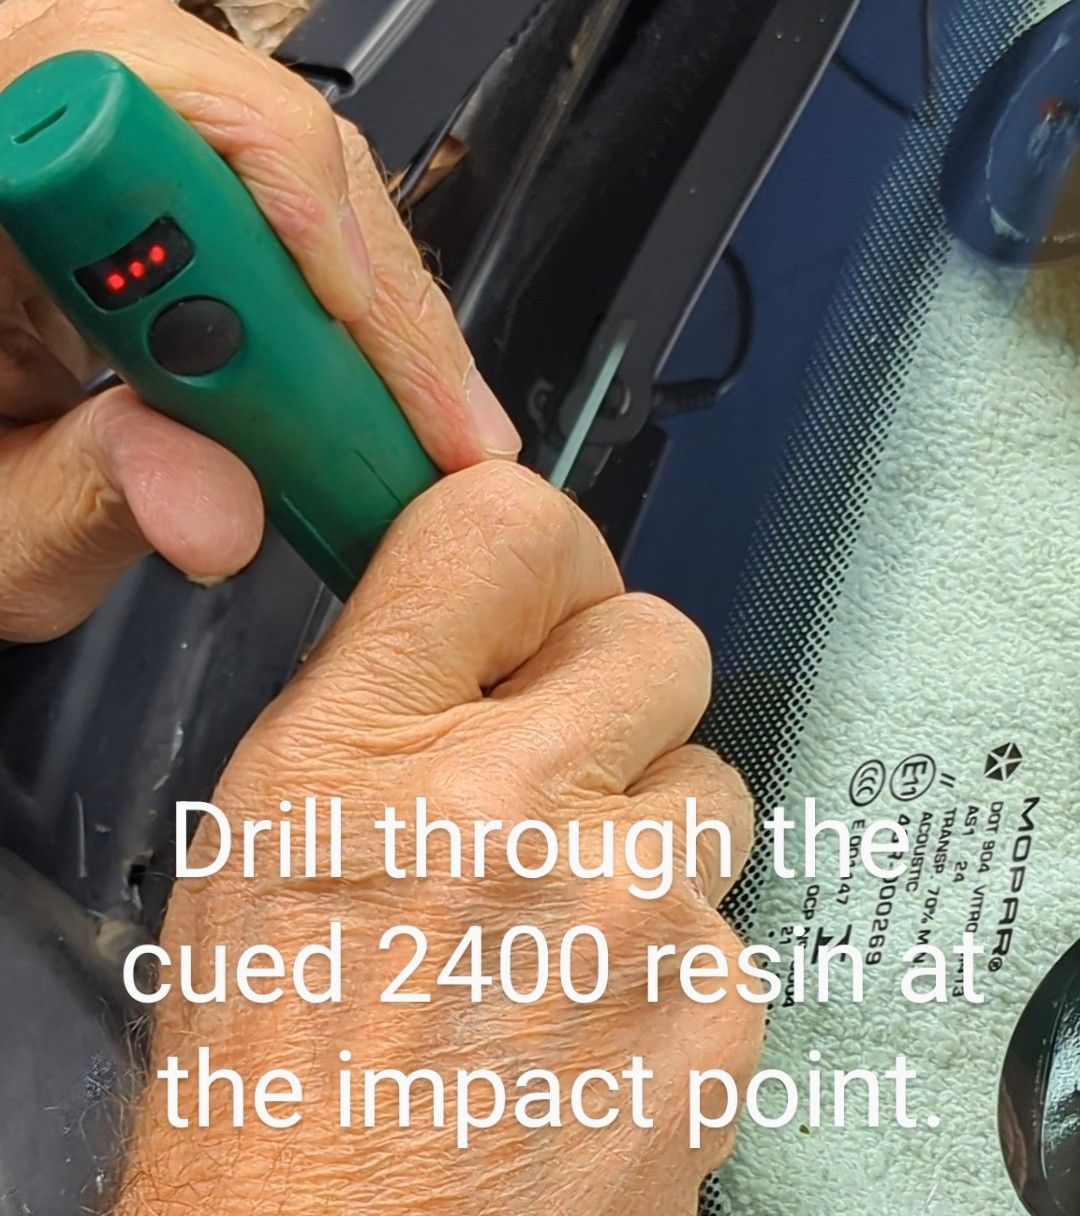
  2. After step 1, take your injector and fill it with 1600 or 2400 cps windshield repair resin and place in the structure. Mount it on the impact point on pressure and let it slowly fill. If the star does not fill, take your probe and flex on each leg of the star that is not filling. Manually pressure pushing and probe flexing simultaneously is fast and works well.
     
    OR
     
  3. Refill the injector with 1600-2400 cps and place on impact point in the pressure mode without the structure. Manual pressure push the resin which should push the low viscosity resin to the tips of the legs.
     
    IF
     
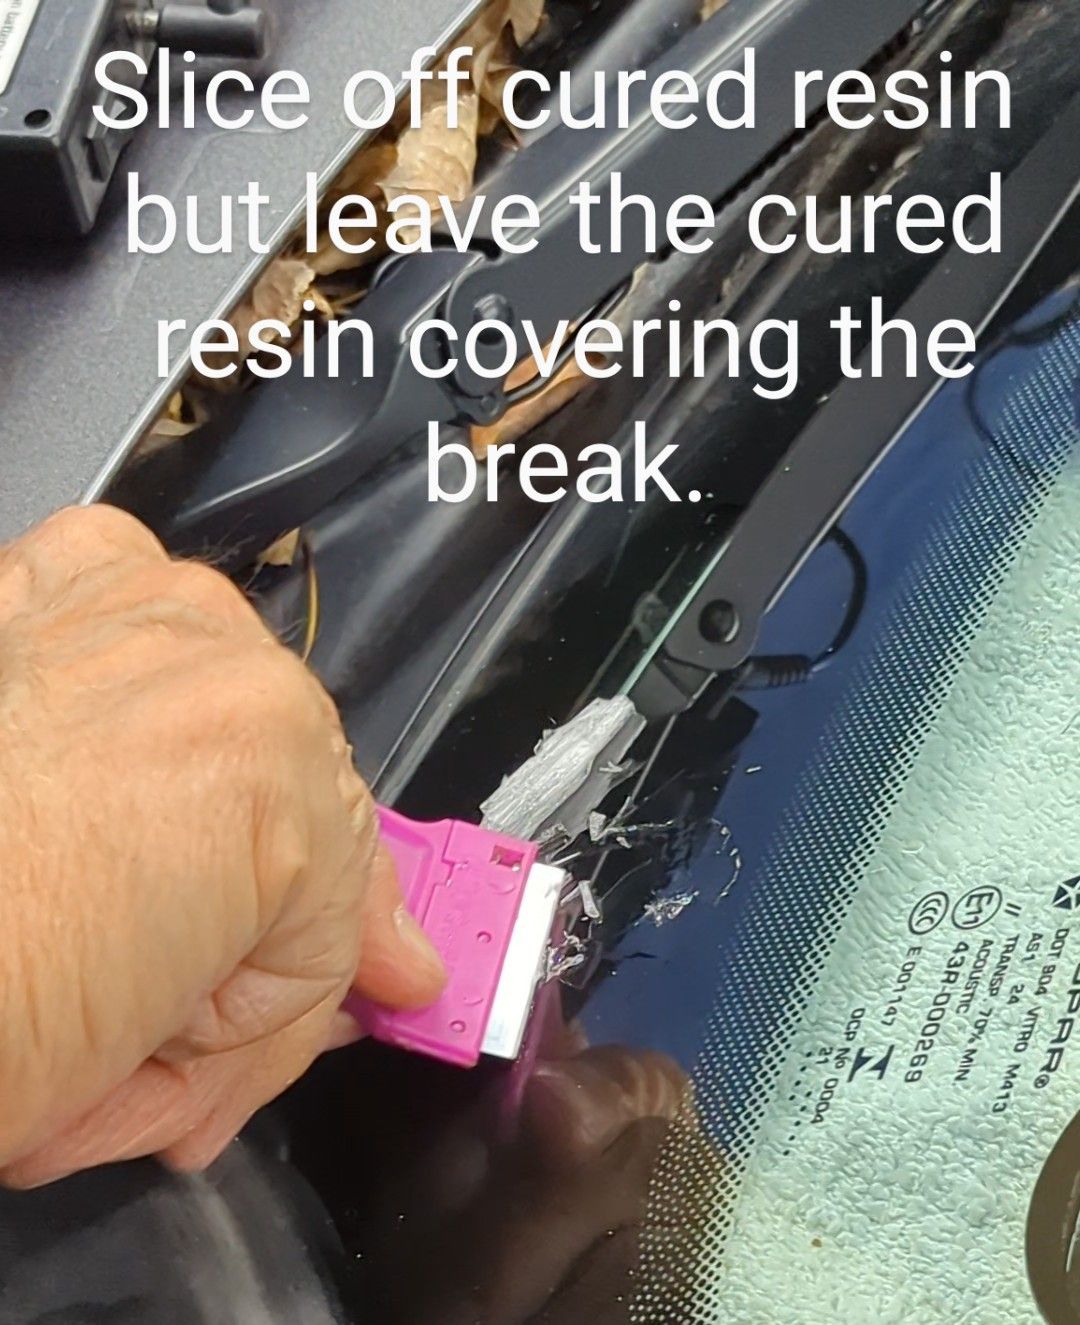
  4. By chance all of the legs of the star still do not fill, continue repair of the long crack and cure. Return back to the legs or areas of the star that did not fill and drill and tap a bullseye. Vacuum and pressure fill. Cure under pressure. Pit fill the drill hole, cure and clean up


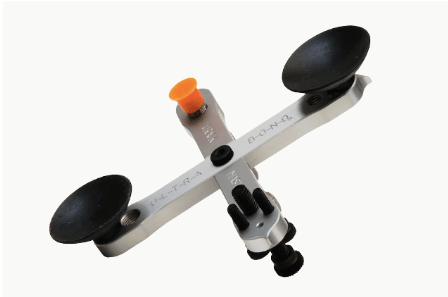
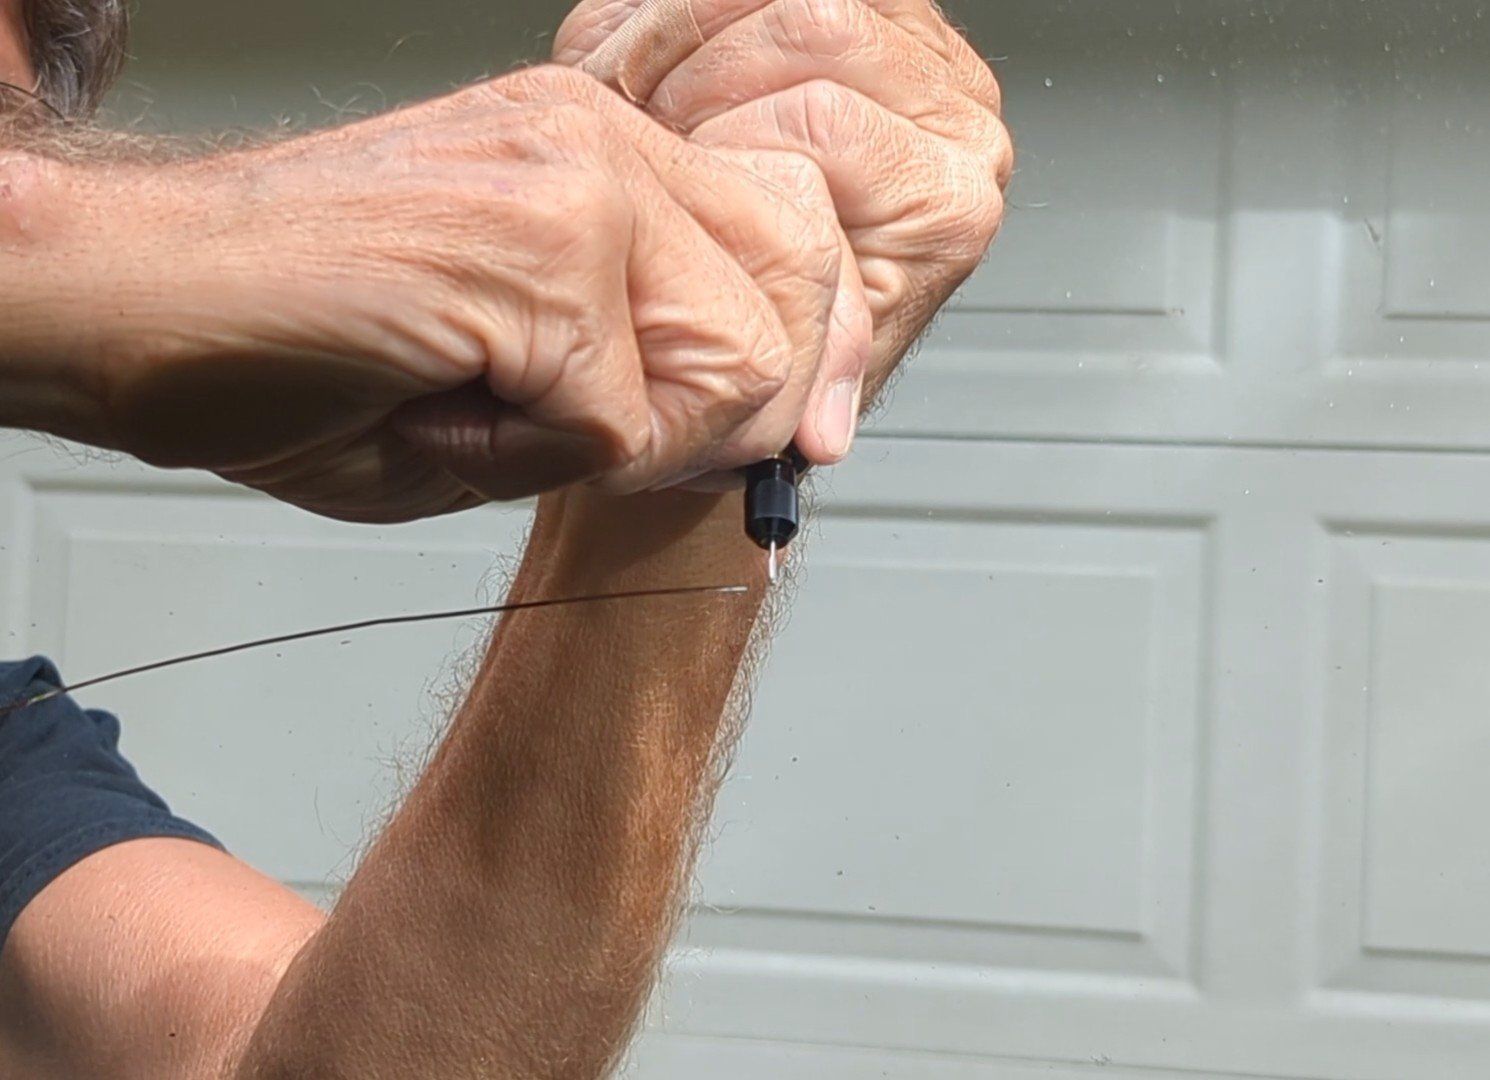
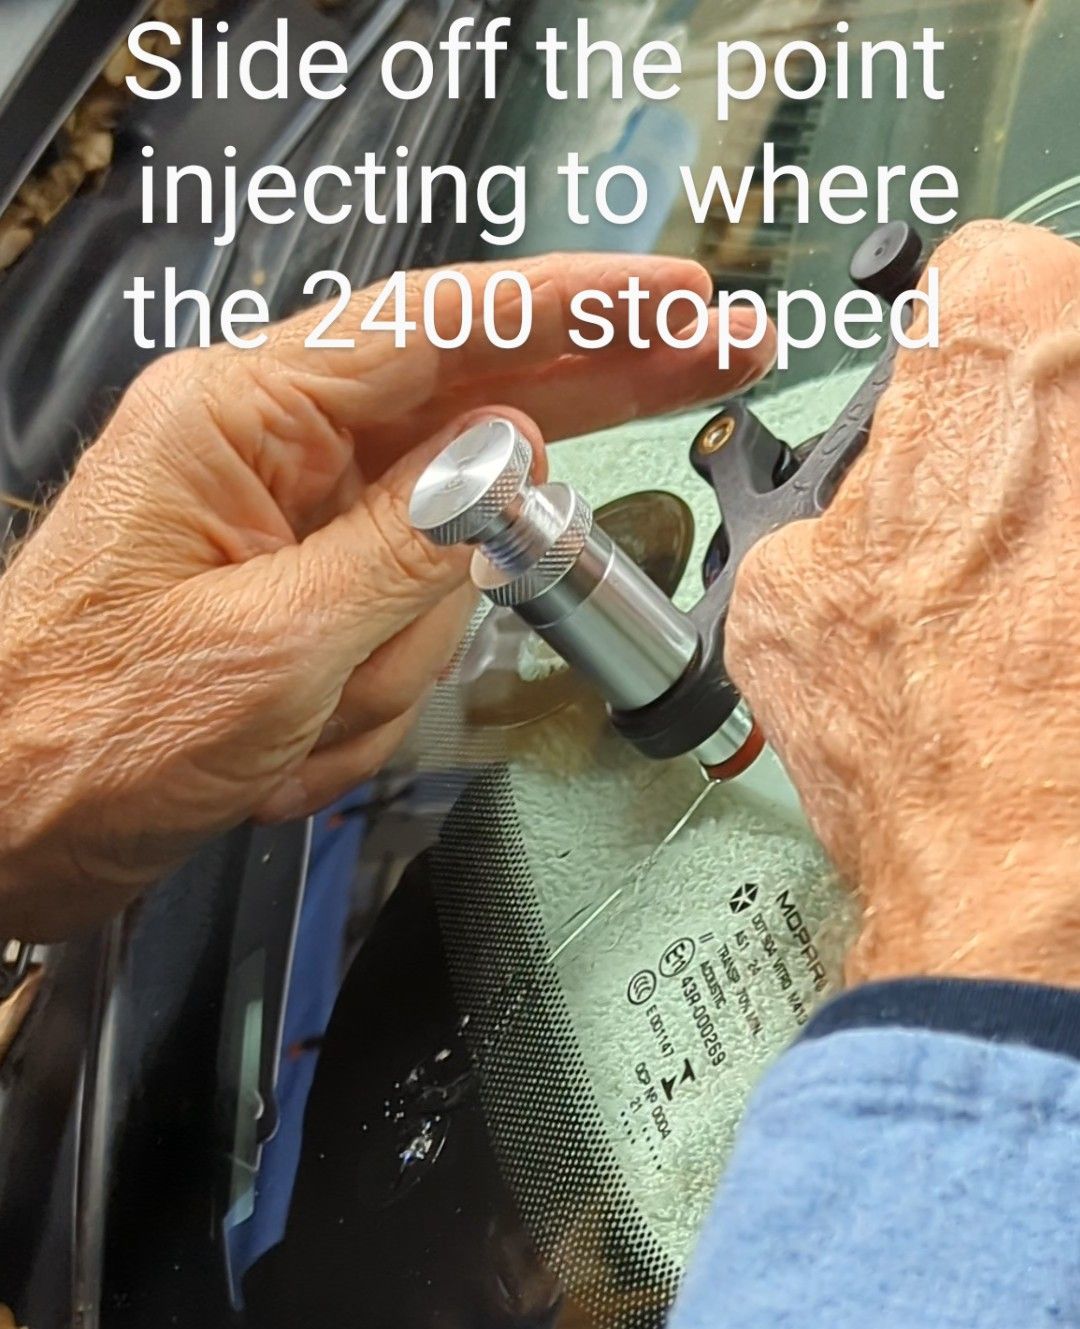
REPAIR TECHNIQUE:"INJECTOR SLIDE"


1. The "Injector Slide" does not use the Crack Master structure to hold the injector. Instead, hold the injector in your hand and slide it along the length of the crack as you inject the resin. This technique can only be used when your eye has been trained to see if the crack is open wide enough to allow the resin to enter and completely fill.


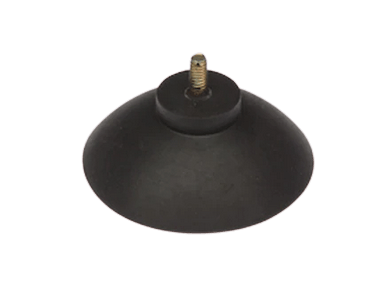
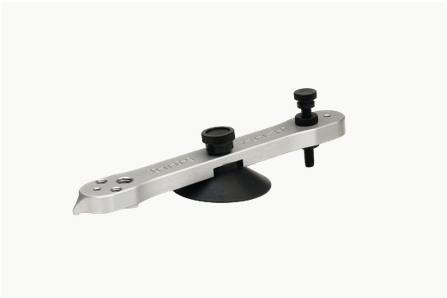
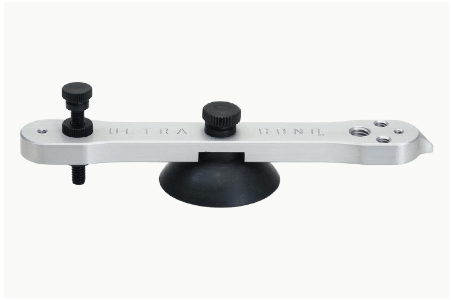
2. Use your long crack slider tool but remove the suction cup. Slide it from the edge in toward the point. Use 1600 if the impact point is the typical pinhead size chip. Use 2400 if the impact is a star or combination break. 


WINTER TIME REPAIRS


Wintertime makes long crack repair a delicate operation and because the cracks are surfaced, your resin will be exposed to the atmosphere. Resin will flow into the crevices of the crack most effectively and bond to the glass when at room temperature and above. If the resin gets cold it will not flow into the crevices or bond to the glass as well. Try to heat the glass and use the heating port by placing a soldering iron into the hole in your injector body to keep your resin warm. This will help, but best results are obtained indoors during the cold winter months. Use the Priming method. The Primers flow into the little nooks and crannies while the thick resin adds the cohesive strength. Be sure your windshield repair kit has all the windshield repair resins and windshield repair tools to handle the winter months.


RULES OF THUMB


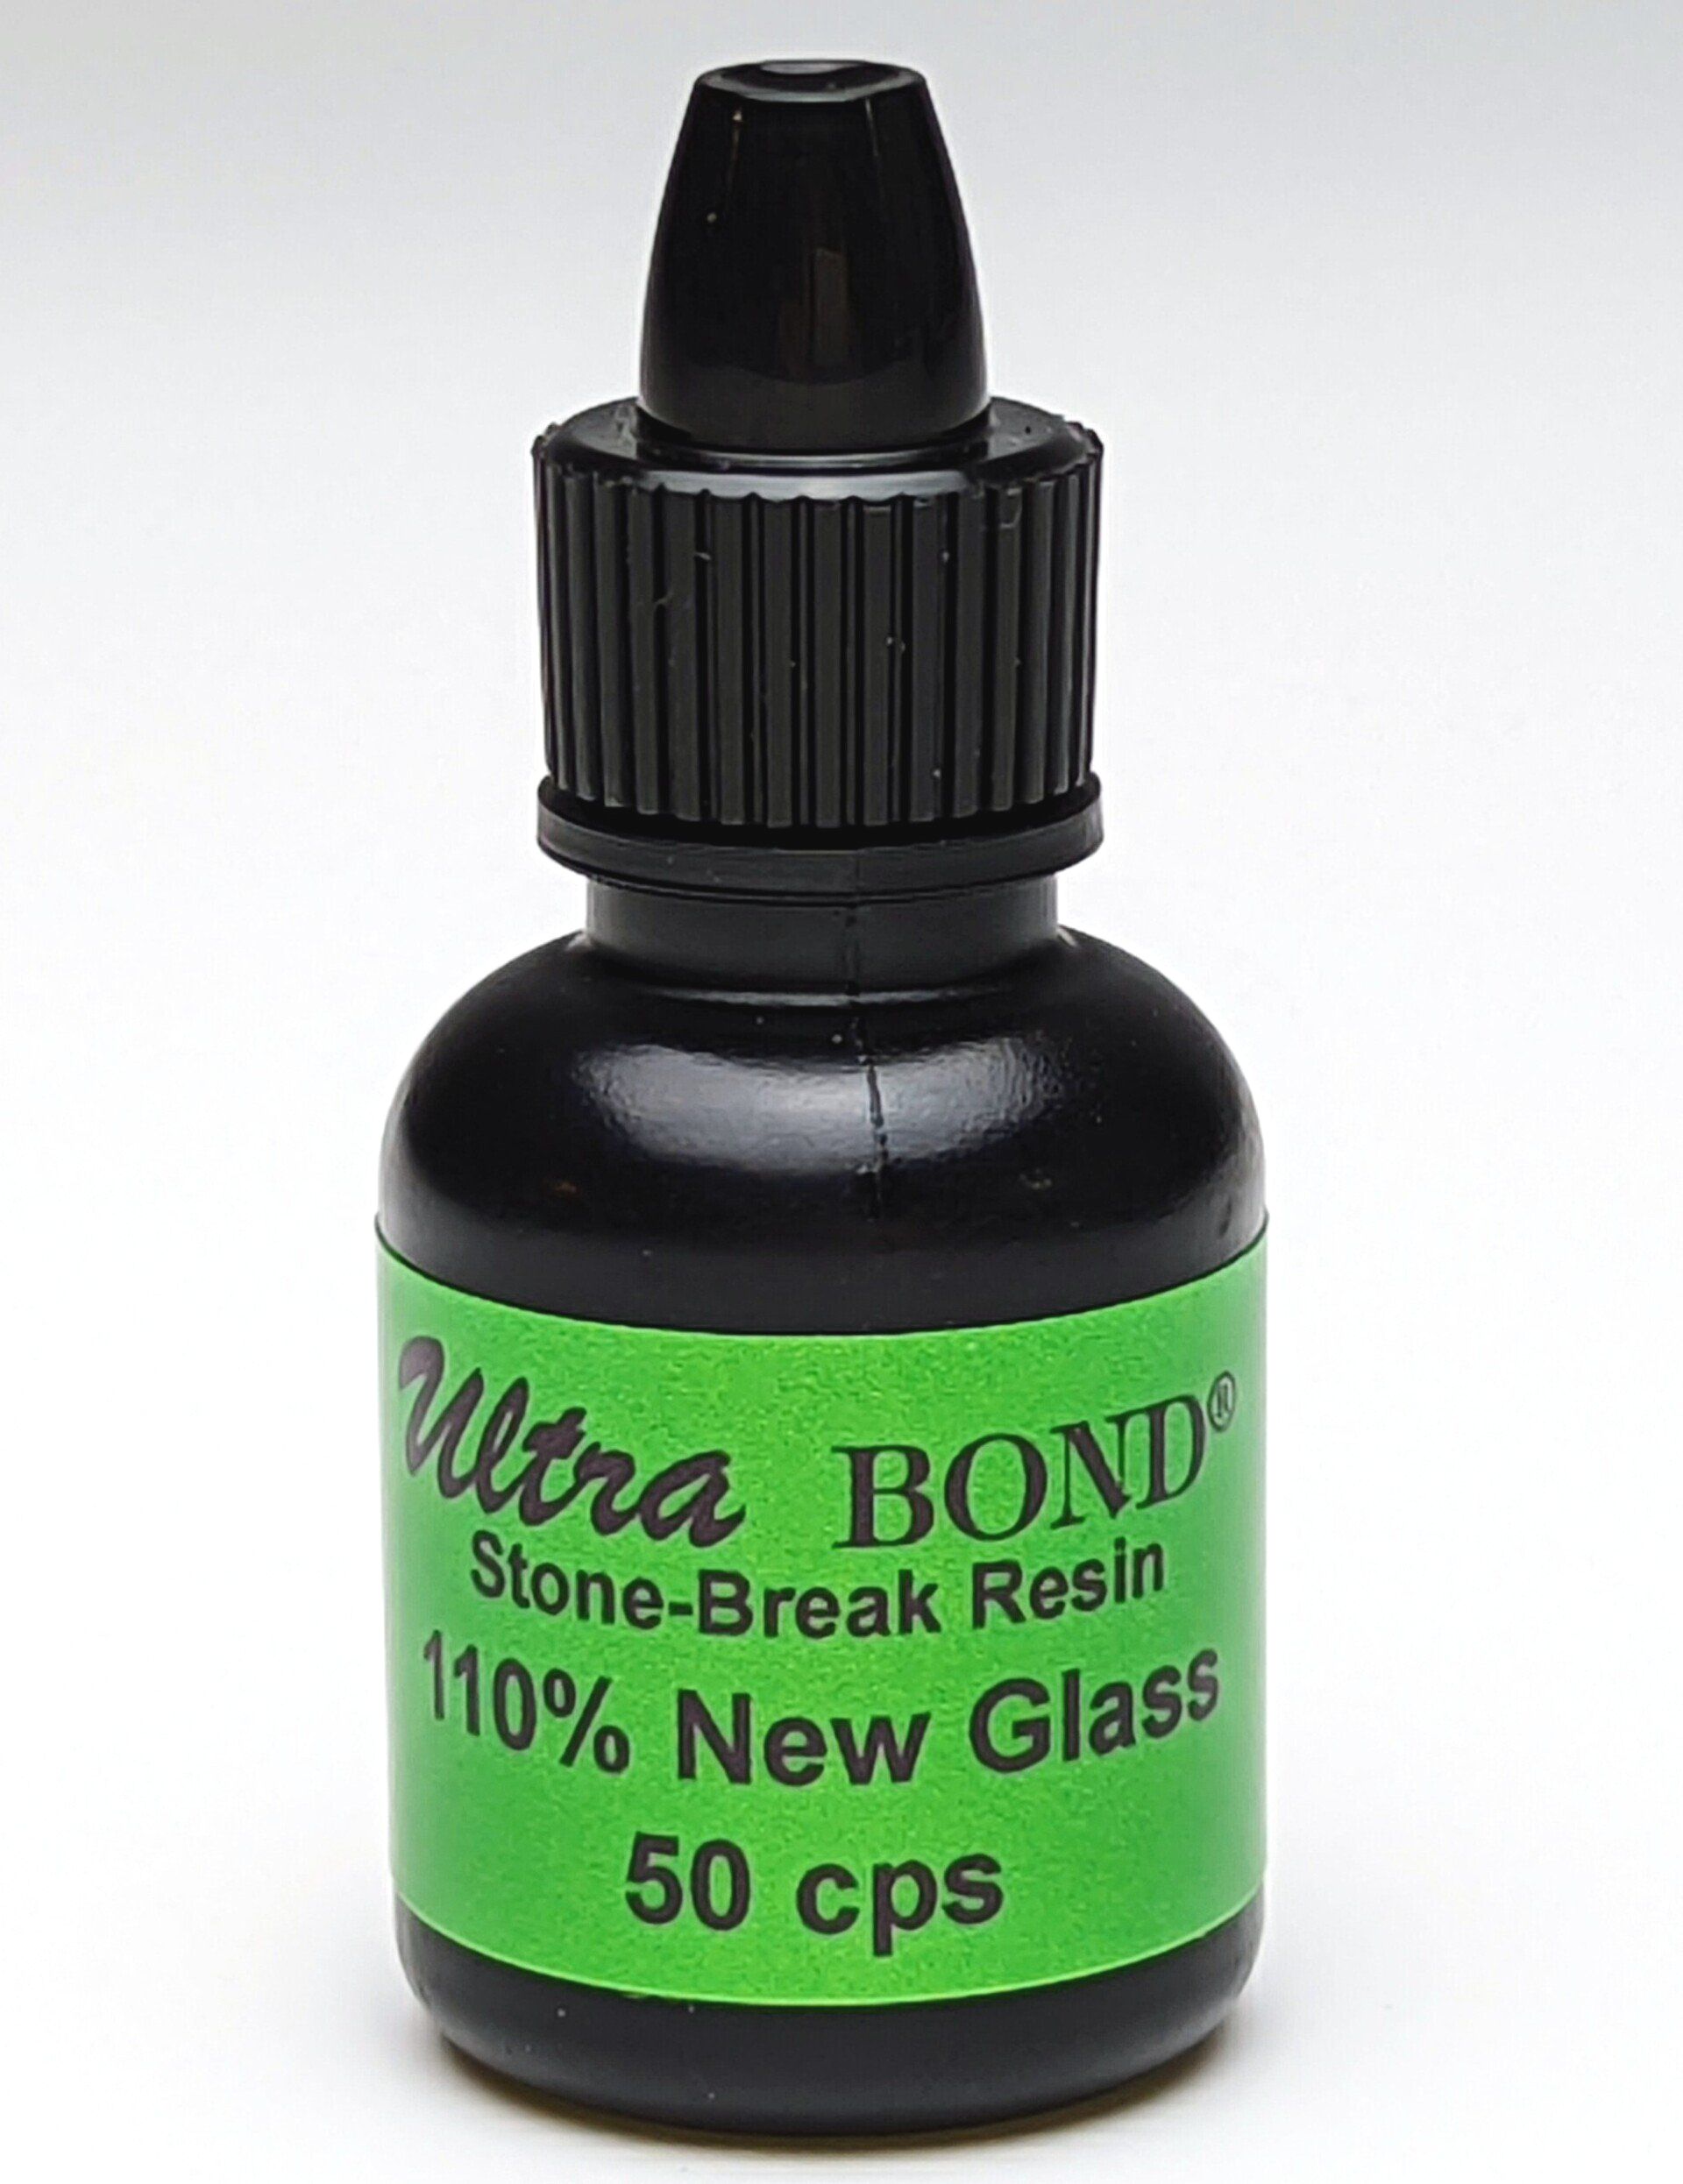
  1. Always fill the crack with the thickest possible windshield repair resins according to the temperature (check bottle labels).


   2. If mobile, you MUST use true shade.


   3. Take extra care on a hot windshield, it is sensitive and damage spreads easily.


   4. If you have more than one crack or break, work from the bottom up, otherwise resin could drip from the first repair into the second damage curing before

        you can repair it and blocking an easy flow of resin.


    5. Warm a cold windshield slowly with the defroster bringing it to a warm temperature.


     6. If you need to flex on a cold windshield, do the point first. Drill a hole at the point and fill about ½" of the crack and cure. Turn on the defroster and warm

         up the windshield. DO the remainder. This will help prevent the crack from spreading when you flex the glass.

Trouble Shooting

Writing down which windshield repair you used as well as weather conditions on all your invoices will assist you in problem solving. Write down any other problems you noticed or were informed about (recently washed or waxed).


1. Refraction line:


There is one problem that can occur in crack repair. "The Runner". This is a thin line of refraction that appears along the bottom of the crack against the lamination (PVB) after the repair is complete. This is generally caused by using a resin too low in viscosity that has shrunk and separated from the PVB during the curing process. Low Viscosity resin has no bond to the PVB and pulls away upon curing. Our 400 resin and higher will not pull off the PVB. The "pulling away" occurs rapidly and spreads (runs) therefore called the "runner". TO REPAIR: Drill into the middle of the runner, tap a bullseye, vacuum/pressure fill with 20 cps resin. Cure under pressure 5-7 minutes, Curing under pressure will force a mechanical bond to the PVB. Fill the pit, cure and clean up.


2. Refraction near point:


Too much pressure with the Crackmaster at the point. Too much pressure can push the crack closed and out of its natural position. The same thing will happen if you forget to remove your Crack Opener before curing.


3. Crack Failure:

  1. Contamination in the crack when it was repaired will reduce the bond and the crack will fail. Clean out cracks before you repair or add one of our additives, like Xtra Bond or X-Phobic.


    2. Windshield repair resin that is cold when it is injected into the crack results in poor wetting (filling of crevices) and compromises the bond. You have

         better control of the temperature if doing repairs inside. Change resin combinations. Try the Priming method. Heat the crack before repairing. Keep the

         resins at room temperature, in a cooler (no ice) during the summer and try a pocket or hand warmer for the winter. Keep your windshield repair kit under

         controlled temperatures as much as possible.


    3. The wrong resin was used in the remainder/edge. 1600 or 2400 cps works best. Change resin combinations. Try the Meet in the Middle method or start

         repairs at the edge and work towards the point.


    4. Windshield repair resin has been through too many changes. Temperatures can be better controlled if indoors if possible. Store at room temperature, in a

         cooler in the summer and try a pocket warmer in the winter. Never leave your windshield repair kit in your vehicle over night.


    5. Too much stress on the edge. Drill and tapping a bullseye at the edge by the molding may relieve some of the stress and it will fill easily with 2400 cps.


     6. Solvents were in the crack. Always ask the customer before you start if Rain-X or a similar product was used, or if the car had been recently waxed.


      7. Try cleaning cracks prior to repair with X-Phobic or use a windshield repair resin additive. This may be the only type of failure that cannot be fixed.

Windshield Repair Equipment Cleaning and Maintenance

Piston & Cylinder:


The piston and cylinder should be washed in rubbing (70%) alcohol at least once a week. You do not need to clean after each job. If resin has begun to cure or is sticking to the piston or cylinder, they should soak in alcohol for at least 1 hour.

Use your cleaning brush provided in your windshield repair kit to scrub out the inside of the cylinder. Make sure there is no alcohol on the windshield repair equipment before you begin a repair because the alcohol will contaminate the windshield repair resin. Alcohol is the solvent to windshield repair resin. If resin spills on the customer's paint (which it shouldn't because you have it covered well with a large towel) DO NOT use alcohol, try a little window cleaner. The resin will remove the paint and alcohol will remove wax.'


O-Rings:

Dip them in alcohol and take them out immediately. DO NOT SOAK. O-rings will swell and will not fit properly.


Film Taps:


Film tabs can be re-used. Let them sit in the cleaning jar with alcohol and remove at the end of the day. They can be used quite a few times.


Battery:


Charge at least once a week.


Tool Box and Other Tools:


Clean the inside and outside of your toolbox and other tools regularly. This makes an impression on the customer as well as your own appearance.

Updates, new products, new instructions can be found on our newsletter website: Windshield Repair Journal


Getting Your Windshield Repair Business Up and Running in One Month

1. Domain Name - Go to www.godaddy.com and purchase a domain name. Your domain name would be the keyword that is searched. Best to get www.windshieldrepair_____________.com .The name of your city or town after windshieldrepair. Example www.windshieldrepairgrandjunction.com is our local website. Cost is about $19.00 for a domain name.


2. Hosting Package - Purchase a hosting packing from godaddy for your domain name. Cost is about $50-70 per year.


3. Website - Have Ultra Bond’s web designer build your website and submit it to the search engines. Time is one week – cost is $350.


4. Internet Advertising - Go to yellowpages.com, yellowbook.com, the yellowpage.com. and list your business under windshield repair, windshields and auto glass. Cost is 0. 


5. autoglasssearch.com will place you in multiple websites. You are only charged when someone calls you from that advertisement. $13.50 per call. Call 888-268-2507 or e-mail support@autoglasssearch.com with questions about their advertising service.


6. Google Adwords- Google will walk you through and help you. You control your budget. It can be anywhere from $100 per month to $500 per month. This places your website on the top of the page when someone in your area searches windshield repair.


7. Google Places – almost like your own website with Google. You will show up on maps organically when people search for windshield repair.


8. YouTube – Shoot a video of yourself doing a repair or about your business. Post it on YouTube with keywords that include the name of the town(s) you work and windshield repair, windshield, windshield crack repair, auto glass, glass repair and auto glass repair, etc.


9. Angie’s List – Go to Angieslist.com and register your business and create a profile. This is where many people shop for a credible business. Cost is 0.


10. Craig’s List – Local internet classified advertising.


Networks and Insurance Companies

Filing the Claim for the Consumer - take control, do not let the consumer make this call alone or it will be steered into a replacement and to one of their shops.


Call the claim phone number on the insured's proof of insurance card and follow the prompts. After you call in your first repair you will be in the system and they will fax you tax forms for you to fill out and fax back to them. You are then in the system. You will get paid within about 30 days.

  • LYNX - Fax your invoices to Glass Comp. at (239) 479-6161
  • Safelite - go to www.sgcnetwork.com and fill in the blanks
  • Harmon - fax to the number on the dispatch they fax to you


Have the Assignment of Proceeds printed on your invoice.


Assignment of Proceeds - In consideration of [COMPANY NAME]'s agreement to repair or replace my damaged automobile glass, I hereby assign my auto glass claim and all policy proceeds due me for the glass claim under the terms of my insurance policy to [COMPANY NAME]. Accordingly, I instruct my insurance company to address all issues associated with this claim with [COMPANY NAME] and to pay all amounts amounts directly to [COMPANY NAME]. I authorize my insurance company to release policy, coverage and other information related to this glass claim to [COMPANY NAME]. I agree to pay my deductible, if any, myself. I also agree that if I do not have insurance coverage, I will pay for the work myself.


Getting Paid for Long Cracks - see the newsletter here and/or call Rich Campfield (970) 256-0200

Getting Paid for Long Cracks - see the newsletter here and/or call Rich Campfield (970) 256-0200

Getting Paid For Long Crack Guide - From your customer's insurance company and or agent direct! Never loose another job, Ultra Bond, gives you immense power in the market from the current and ongoing lawsuit against Safelite. Read How Here


Learn How To Close Your Windshield Repair Leads - Discover how to close more of your windshield repair sales calls with this guide directly from Richard Campfield. Become a solid closer and increase your profits days after reading this guide. Read How Here


Contact Information


2458 E. Main Street, B-1, Grand Junction, CO 81501
970-256-0200 (phone)
970-256-1786 (fax)
Company Email


This web site is provided by Ultra Bond and is strictly about windshield repair resin, tools, equipment and supplies.


Share by: